by Matt Philleo | Sep 21, 2016 | Art Shows
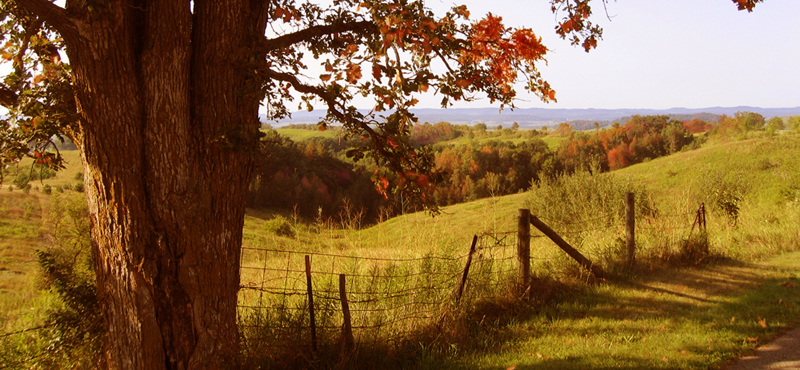
On my way to Bushel and a Peck Apple Orchard last Saturday, I noticed the tops of trees were already aflame with the crimson and gold colors of the approaching fall season.
They rarely turn that fast in the city.
But somehow in the country, the air seems to be colder and flows freer, causing the stalwart deep green foliage of summer to retreat just enough to let the autumn hues emanate into the leaves again.
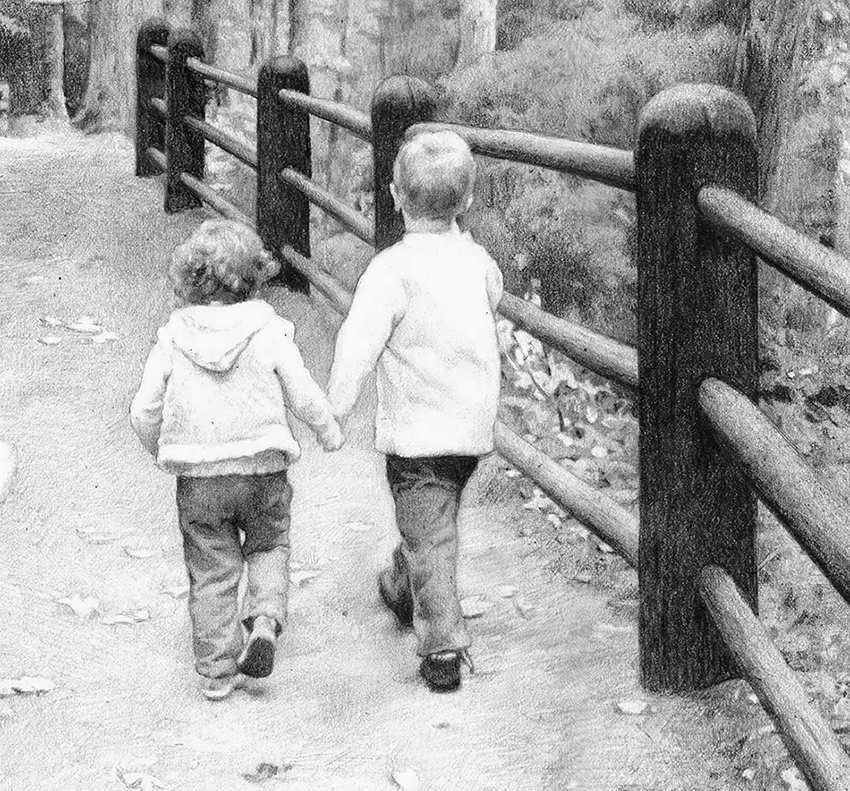
“Let’s Go on an Adventure”, pencil on paper, by artist Matt Philleo
As an artist, it makes me think of the beautiful, idyllic drive or walk in the country that many folks will be taking as they travel on the Falling Leaves Art Studio Tour. I’ve been a part of it for over five years, and it’s been something I look forward to and prepare for all year long. (At least I try to 🙂
Better than just going to a gallery show or a arts and crafts fair, on the tour, people have a chance to visit the artist in their own environment, see some of them at their craft, whether it be painting a canvas , throwing a pot on a wheel or fashioning a creation out of yarn. In between the stops, you can take in the sights that the rural Augusta and Fall Creek, WI area have to offer during the beginning of autumn.
Last year, I had a great time as a guest artist over at Ron La Blanc’s house and studio. Ron does some colorful, detailed landscape paintings and high quality, functional pottery. Not only that, but he and his family are fantastic cooks. Every year, I am blessed to be the recipient of their wonderful hospitality.
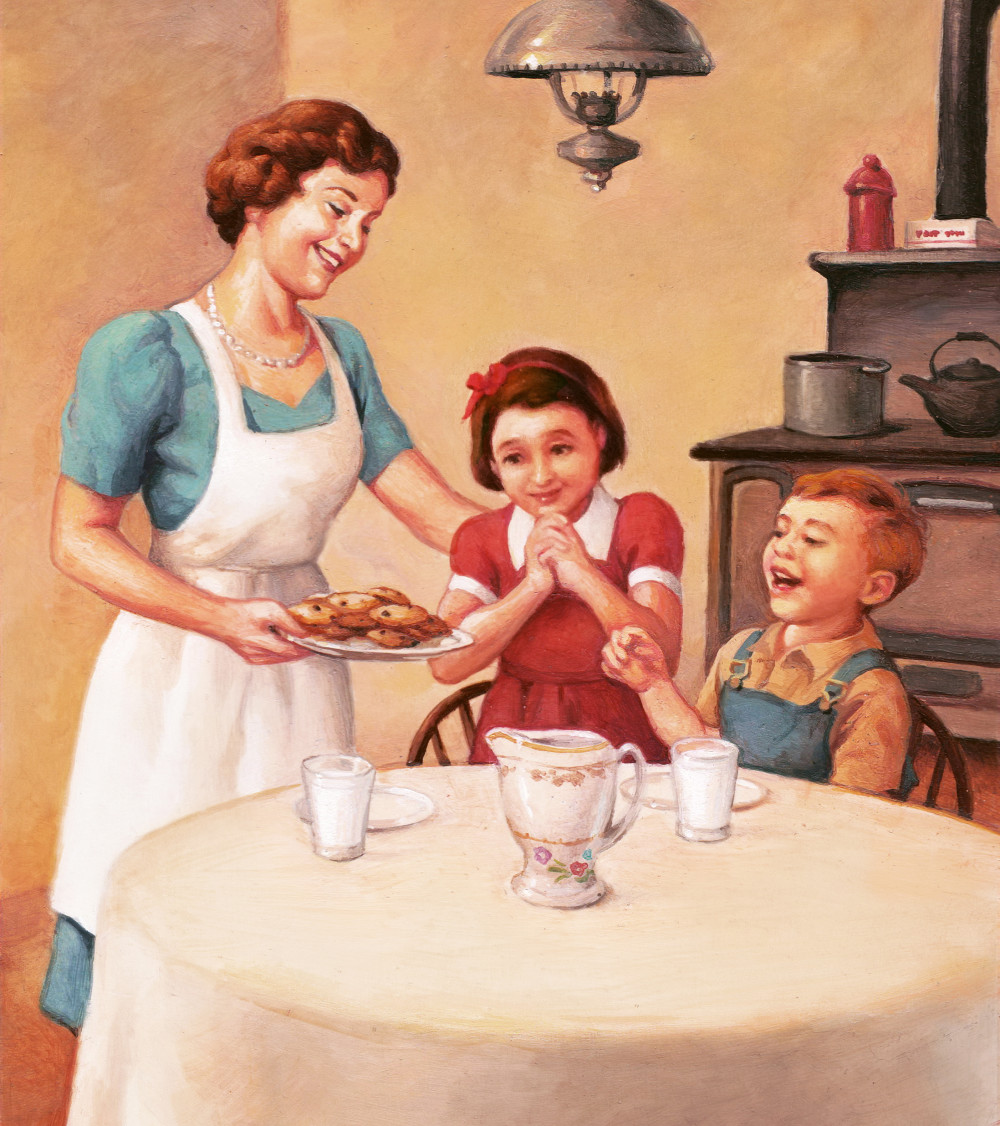
“Homemade goodness”, by artist Matt Philleo
You are invited!
I would love for you to come and visit Ron and I (and the other artists–over 30 of them) on the tour. I will have several new pieces on display and a few favorite older pieces as well. Other artists on the tour will be showing paintings, drawings, prints, photos, pottery, jewelry, carved gourds, antler carvings, alpaca yarn creations, and many other diverse kinds of art!
Come on over, sip some hot apple cider and grab a cookie and a slice of apple pie and see and talk about some beautiful artwork. There will be art and unique gift items for sale as well throughout the tour; you may just be able to get a little Christmas shopping done early!
Falling Leaves Art Studio Tour 2016 Map
The tour is Saturday, October 1, 10am-6pm and Sunday, October 2, 10 am-5pm. For more info and a printable map/ brochure listing all the studios and stops, click the map above or www.fallingleavesarttour.com. I will be at stop #9, Many Pines Art Studio, on County Road M in Augusta. Hope to see you there!
Share Your Thoughts!
If you have any comments or questions about this post, please leave me your feedback below! I will personally get back to you. Can you help me spread the word? Please share this post with your family and friends by using the social media links on the side or below. Thank you!
by Matt Philleo | Sep 15, 2016 | New Artwork
It’s been way too long since I posted on my blog. Please forgive the lapse. I feel like I’m getting back in the game in working on my blog again.
This past month, I was away from home much of the time over in Minnesota, creating a large scale mural like I did last year for the Montessori School. The same client who asked me to paint the massive portrait of his family, hanging out together in their 20’s with New York and Minneapolis in the background had me do another for him.
This time, it was a 8′ x 18′ mural of the new US Bank Stadium for the Minnesota Vikings.
Even a Packer fan has to appreciate the excellence of the Viking’s new venue. Their stadium is a fantastic design, and I heard has tons of artwork on display, as well as several clubs for people to hang out at.
My client, Jim, had mentioned this idea back when I delivered the painting to him in April. He showed me his media room, complete with five big-screen TVs on one wall. (Are you kidding me?) His idea was to have the Viking’s new stadium as the backdrop, and then install a score ticker on the top, roughly matching the size that it would be in the actual stadium. I loved it, and I could visualize bringing it to life for him.
This would be more than just a picture decorating the room.
A mural is not just a painting on a wall–it’s a painted environment.
In August, things lined up and Jim pulled the trigger. So I got a bunch of paint ordered, supplies packed up and started painting August 15th. It worked out great that my brother in law lives in Eagan, MN, just minutes from my client’s home in Lakeville. I was able to stay at his place for several nights while working on the project.
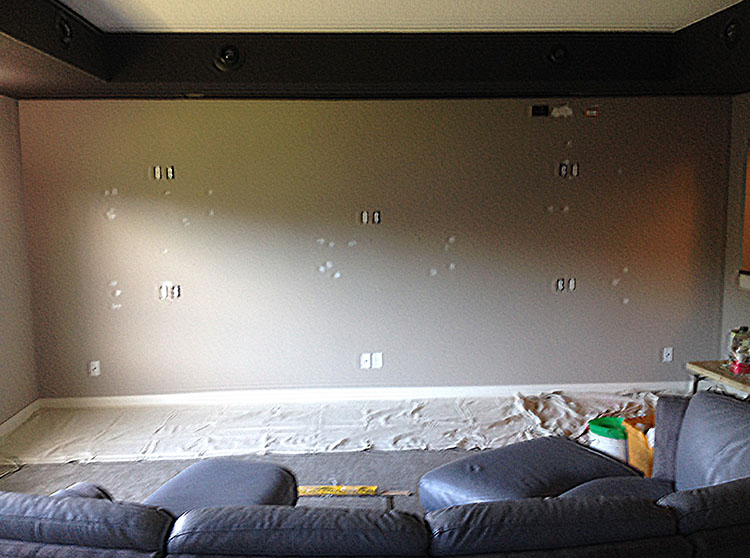
The start of every mural project: a blank wall.
Now, to get off to the right start.
The first thing to do after hauling my paint and supplies to the upstairs room was to measure the wall. The Vikings logo at midfield was to be right in the center of the wall, just below the main TV. However, I instead placed the the midpoint about five inches to the right of that mark, right where I noticed holes in the wall for the mounting bracket of the center TV. Since the logo was supposed to be directly below the TV, I reasoned it would be best to line midfield at that point, rather than the wall’s actual center.
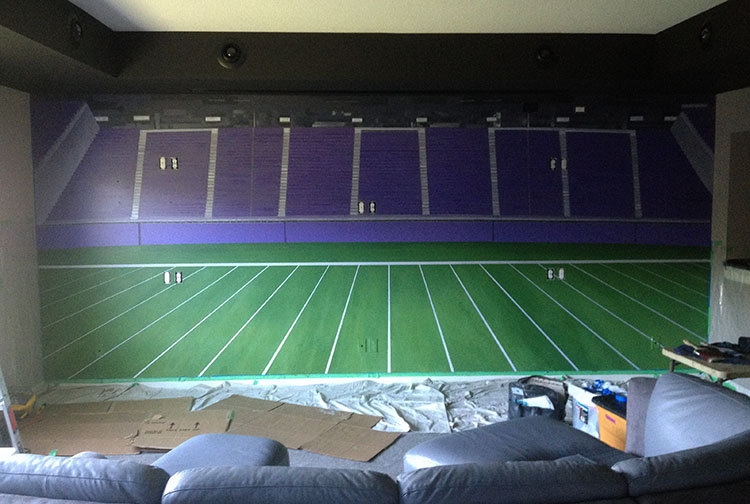
Next, I taped the wall off and set down my drop cloths. Standard procedure for any mural job, where a person is going to spend a lot of time on one wall. I got out some purple first, which would serve as the background color, representing the thousands of seats in the stadium.
After applying it, I noticed it looked kind of dark and grey.
The value and tone was perfect when I selected it.
Why did it look so different here?
And that is almost always how it goes. You can pick a color at the paint store and it looks wonderful with the rich, even lighting there, but put it in a real environment where there are strong shadows and reflections, and you get a whole different look.
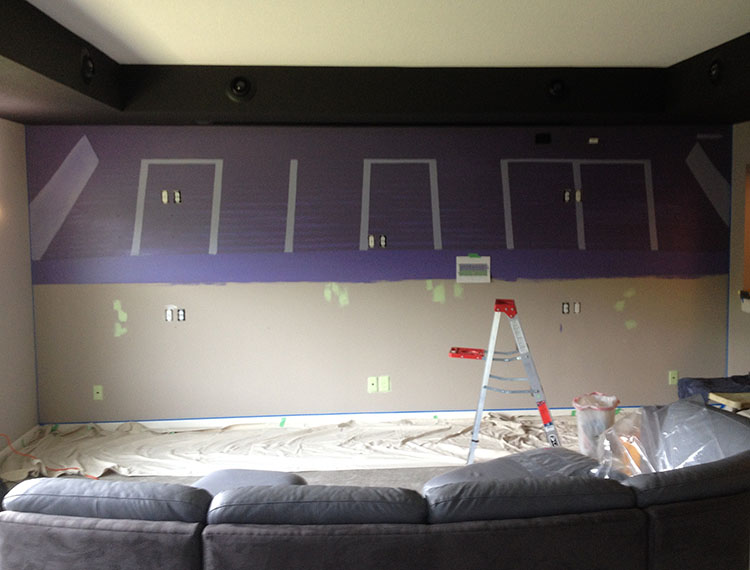
US Bank Stadium Mural, 8′ x 18′ Jim C’s home, Lakeville, MN, in progress
So, just like when the quarterback sees something on the line he doesn’t like, I had to adjust.
I mixed a more intense purple and went over the whole area.
Next, I painted in grey stripes to represent the walkways between the seats, detailed them with lines to indicate steps, and then I painted the area above the seats: the lights, monitors, and clubs within the upper areas of the stadium.
From time to time, Jim would check out my work. He reserved judgment.
“I know it takes a lot of layers,” he said.
Although I wanted him to like it, and certain points during the job, I wasn’t sure if he did, at least I knew he understood the process of creating art well enough that things sometimes don’t look so great in progress.
This is a way different than doing art in the studio where I am accustomed the “in between stage” of a painting sometimes looking pretty crazy, and even downright terrible in the initial stages. But there, it’s just me and the painting. The client doesn’t see it till it’s done.
So I’m not saying I was scared to do a painting on someone’s wall, but I am a little more aware of my process and what the client perceives as it takes shape. Jim and his family put me at ease however, and just let me do my thing.
Well, once I got into the green for the field, things were rolling pretty well. I was coming to the end of the week and at a good point. But then I hit a major impasse.
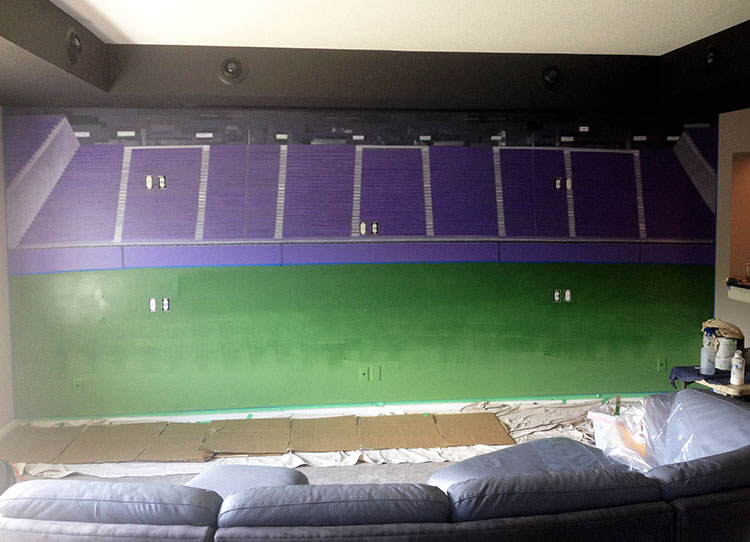
US Bank Stadium Mural, 8′ x 18′ Jim C’s home, Lakeville, MN, in progress, green added
Sometimes you have to get a little grass on your helmet before you can win the game–complete the painting successfully.
Jim and I were discussing the progress, and I mentioned how I cleverly lined the field up with the holes for the mounting bracket.
“Um, the TV won’t be going right over those holes,” Jim mentioned. “the holes are there because of the studs. The TV is going to sit right in the center of the wall.”
Uh oh. First and goal and the ball somebody fumbled the ball.
“We have a little problem,” I said.
As I mentioned earlier, I designed the mural to revolve around what I believed to be the center, based on those mounting holes, instead of the actual center. I was over five inches off! To bring up the football analogy again, you know as well as I do, a game can be won or lost based on just inches.
To resolve the issue–which was clearly my fault–I offered to repaint the stadium rows to make them line up with the actual center of the wall. But that would take a day’s work at least. Jim said that wasn’t necessary. But he did want me to line up the field with the TV. We agreed to go with this compromise, but it bothered me that a person may be able to see how the stadium rows didn’t quite line up with midfield. Fortunately, Jim had noticed that the midpoint of the wall was actually a couple inches from what I thought it was. This meant that instead of the stadium seating rows being five inches off from center, they were actually only about two.
This was a gap that was way easier to bridge.
So I lined up the midfield at this point.
What a blessing! I was thanking God for this breakthrough!
Yard markings added.
I continued to work, and began the stripes delineating the yard markings on the field. To get everything accurate, I printed off a scaled version of the design, at a ratio of 1:24.
Then I measured, calculated, and measured.

Drawing the yard numbers in chalk.
I never realized I could use this much math in art!
Not only did the stripes have to be at the correct angle and the correct distance apart, but they had to widen at the just the right amount, to looks as if they were coming toward you in perspective. I marked everything off in chalk first and then, taped off what I was going to paint. It’s the best way to get razor sharp, straight lines.
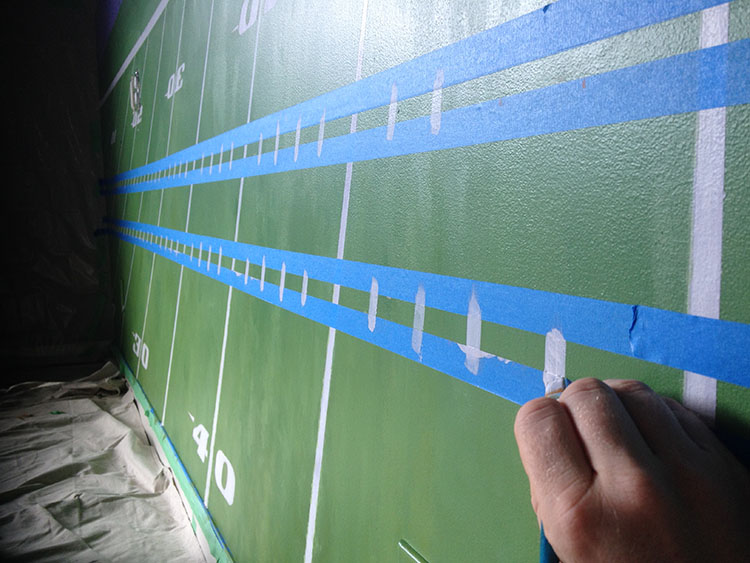
Carefully painting in the hash marks, with masking tape as a straight line to keep the edges sharp.
Once the yard markings were in place, the field looked incredible. The illusion of perspective was so strong, that when I stood close to the painting, I felt as if I would fall in! It was a weird feeling.
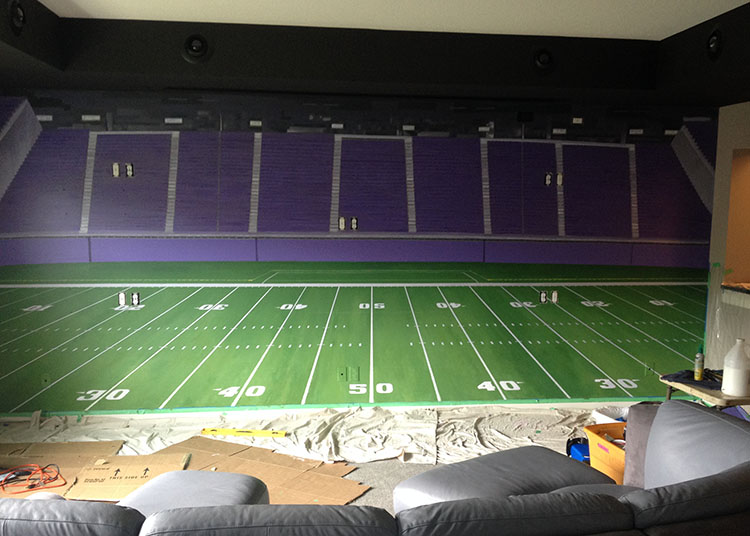
The completed football field, minus the logo.
At this stage, I could tell Jim really loved what he was seeing. So did I.
I felt like I was on the finishing drive now.
The last few days I worked on the logo. The quickest and most accurate way to paint this, was to use an overhead projector. After getting the image to the correct size, I painted color by color. After a little work, it came out just right.
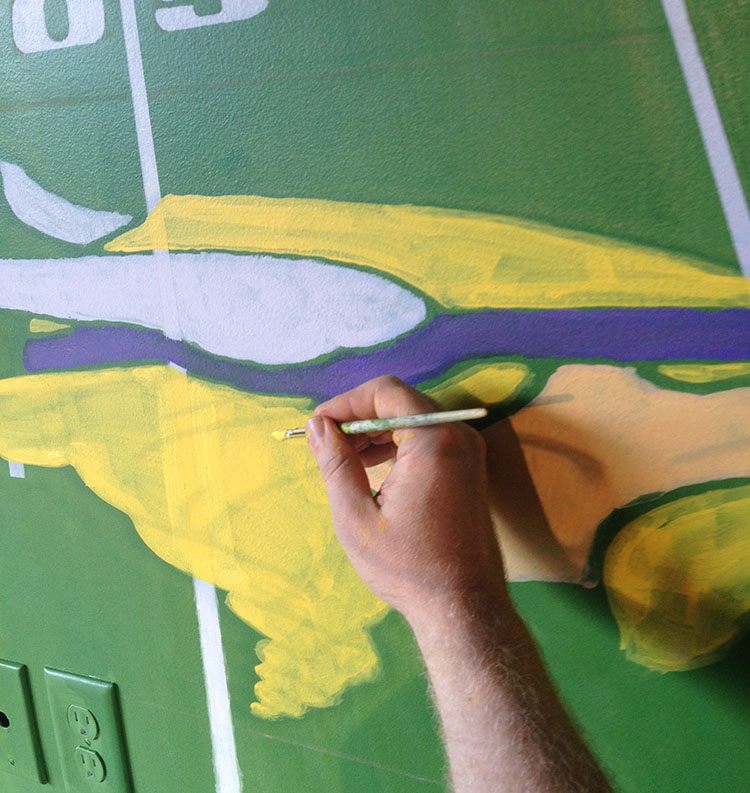
Painting the Viking’s head, initally with simple base coats.
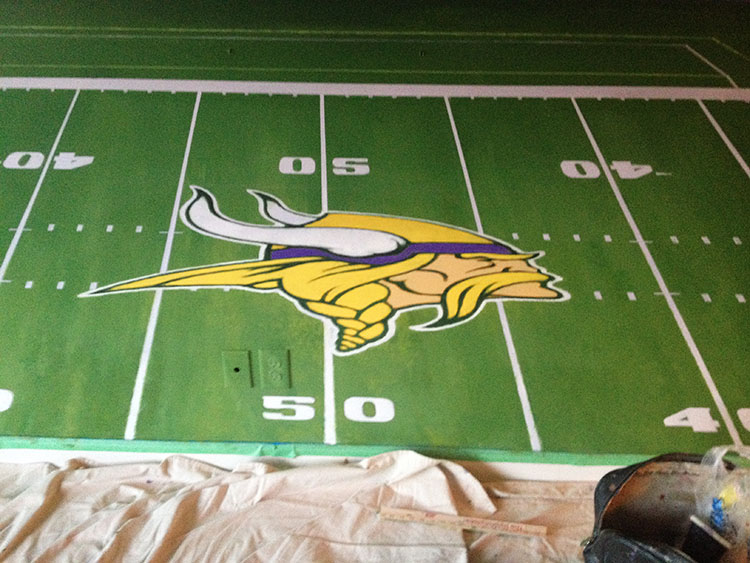
The completed logo.
Finally, I painted some detail on the stadium walls that was missing. Jim and I both agreed that the Vikings face logo that was repeated in the actual stadium on the walls was overkill, so instead he thought of something way cooler: to paint the Vikings text logo and just one head on either side.
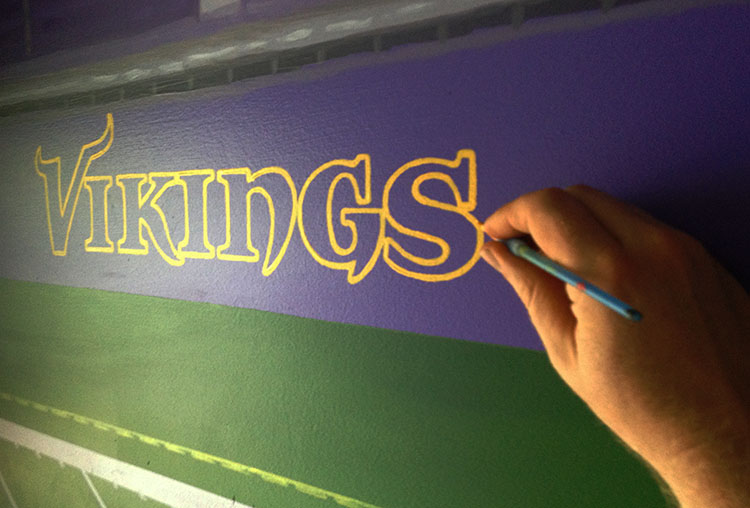
Painting in the logo precisely.
It was a great result.
Always room for one more…
There was a little more detail that Jim thought was needed to complete the mural. A couple days before it was done, when I came in for the morning’s work, he said, “Matt, something is missing in this painting.” I was thinking, “Oh great, what is it?” I thought maybe I had made a big error like I had with the midfield measurement.
I said, “Why don’t we look at the mural and you can show me.”
How much time is this going to take? I wondered.
So we went upstairs and he said, “Right at about the 30 yard line, I need this added…”
And then he showed me a picture on his cellphone of Aaron Rodgers, flat on his back!
“Oh man, you got me!” And I slapped him on the back. We both laughed.
I figured I would have to get him back now.
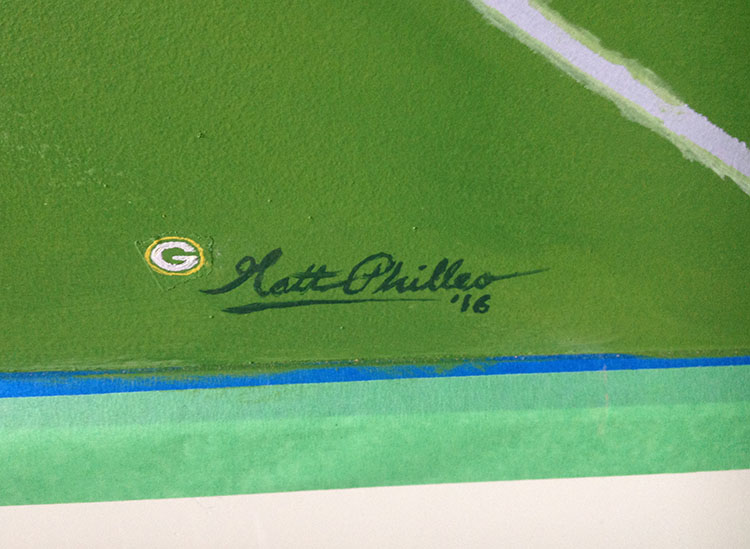
A final touch.
So when I signed the mural, I painted the Packers “G” logo next to my name, but I put it on a piece of masking tape. I had all my paints cleaned up, and finally Jim noticed the little addition. He said, “What…is that? You left than on there? You did not!”
I let him look at it in amazement for a bit, but then I just peeled the logo right off.
“You got me!” he laughed.
Here is the photo of the completed mural the day I finished it, with Jim and his wife Chris standing happily in front.
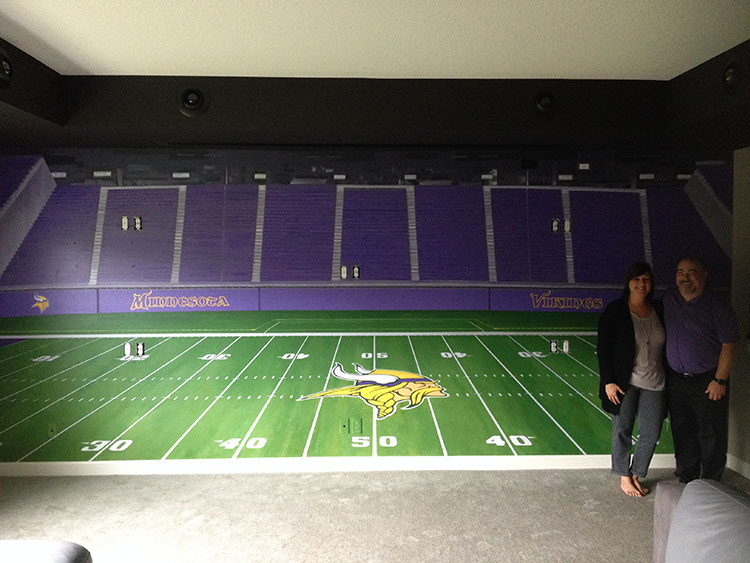
The completed US Bank Stadium Mural, 8′ x 18′, at Jim C’s residence, Lakeville, MN
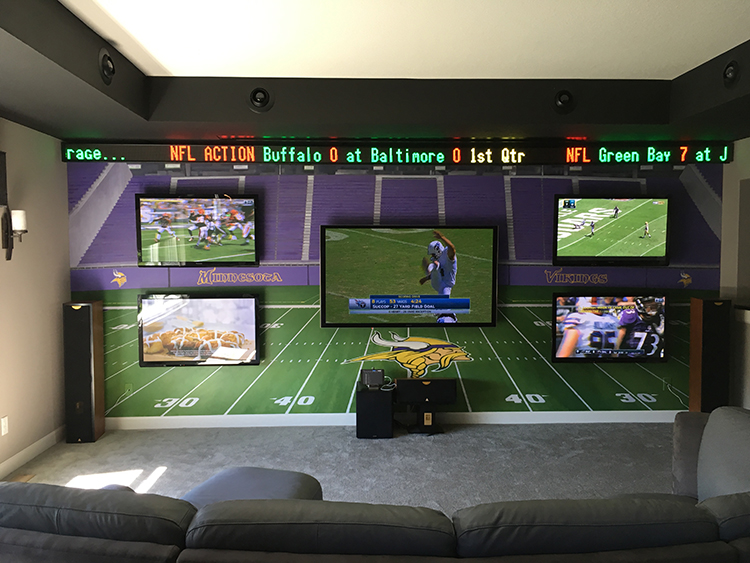
And then, a photo of the mural with the TVs and score ticker installed, all doing their thing on game day!
US Bank Stadium hand-painted custom mural at Jim C’s residence, Lakeville, MN. 8′ x 18′
With all said and done, this was one of my more challenging and rewarding projects. And as with most things in life–there are challenges to overcome, but if you stay true to your vision even when things don’t look pretty and rely on the Lord’s help, you can get create something excellent that brings enjoyment to others.
Share Your Thoughts!
If you have any comments or questions about this post, please leave me your feedback below! I will personally get back to you. Can you help me spread the word? Please share this post with your family and friends by using the social media links on the side or below. Thank you!

Recent Comments