by Matt Philleo | Jun 3, 2016 | Encouraging Thoughts
The passing of Memorial Day heralds the beginning of summer and with it, the camping season. I love this time of year. The weather is still fairly temperate and the days are long.
I also love camping.
It’s the combination of cooking fire over the open flame, and “roughing it”–leaving many of the conveniences and distractions of home behind that charms me.
More than that, it’s wonderful to be out in nature where you can be calmed by the green, translucent canopy above, the sounds of leaves rustling in the wind and dragonflies buzzing, and to be able to take scenic hikes at leisure.
My wife was hiking on a beautiful sunlit trail at
Copper Falls State Park in Northern Wisconsin, carrying our daughter on her shoulders, and I snapped the photo that this painting was based on.
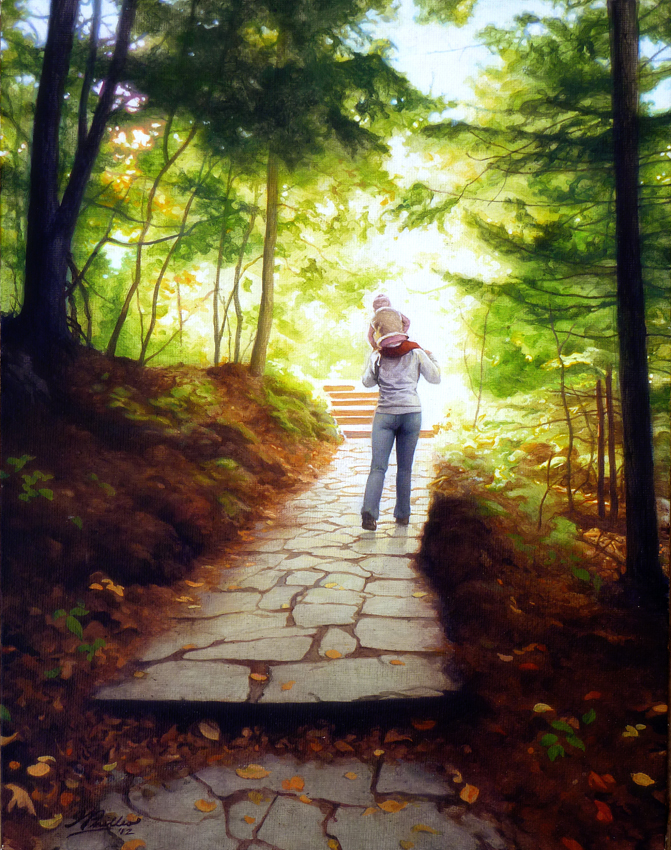
“Waking Up the Woods,” Acrylic on Canvas, by Matt Philleo
Below is a commissioned portrait sketch I did that celebrates that love of camping. This drawing was made from an older photo, decades old if I remember correctly.
Here we can see the husband and wife just enjoying being out together camping, and they look pretty happy. This freehand drawing took a few hours and, although not at my more photorealistic level of work, I think it captures the feel of the picture without too much fuss.
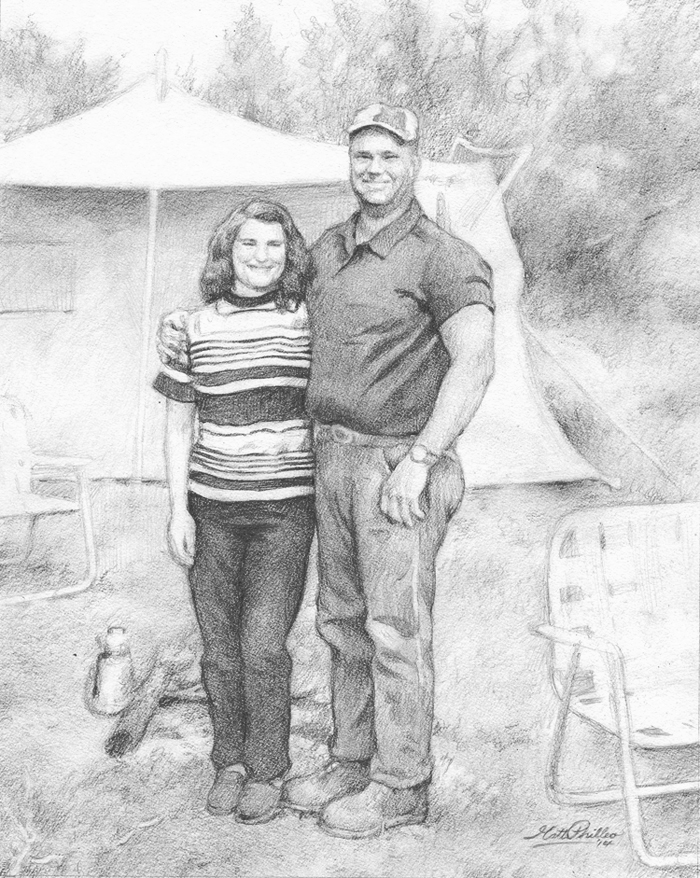
“Good Old Fashioned Camping,” 11 x 14 pencil on paper, by Matt Philleo
For folks that camp at the same place every year, their spot can begin to mean a lot to them–a home away from home. Here is a drawing I did for an old friend from high school based off a photo of his parents’ cabin.
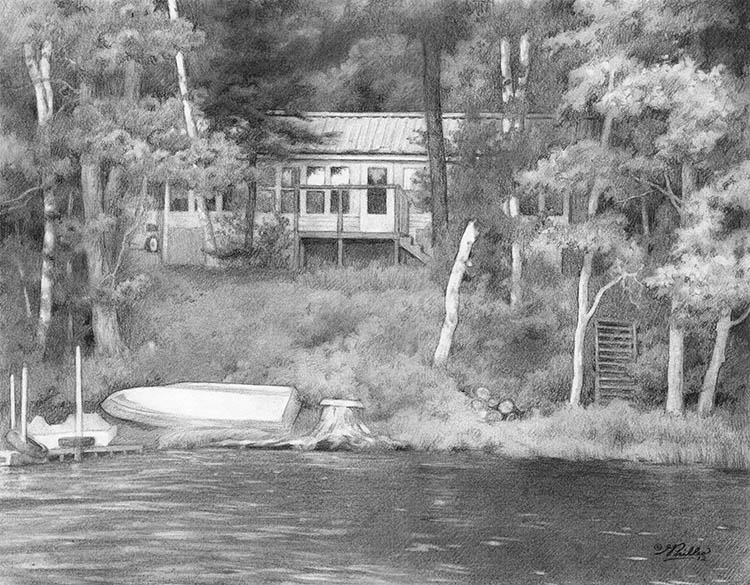
“The Johnson Cabin,” 11 x 14, pencil on paper, by Matt Philleo
After the drawing was done, they gave it to them as a gift. Pretty thoughtful gift!
Ok, I have to admit, I’m kind of big pyro.
For me, the campfire is at least 50% of the fun of camping, and I pride myself on being able to start and keep a campfire going, without buckets of gasoline and scorched fingers. I would rather cook a pizza over an open campfire in an oven any day.
I was never in Boy Scouts, but as an adult, I did learn to create a fire the old-fashioned way: by rubbing two sticks together. Well, actually, I used the “bow drill” method, where you take a curved stick with a taut string tied to either end and use its tension to rapidly drill a wooden dowel into a block of soft wood. That, in turn creates burnt sawdust which eventually ignites a coal that you can blow into a flame.
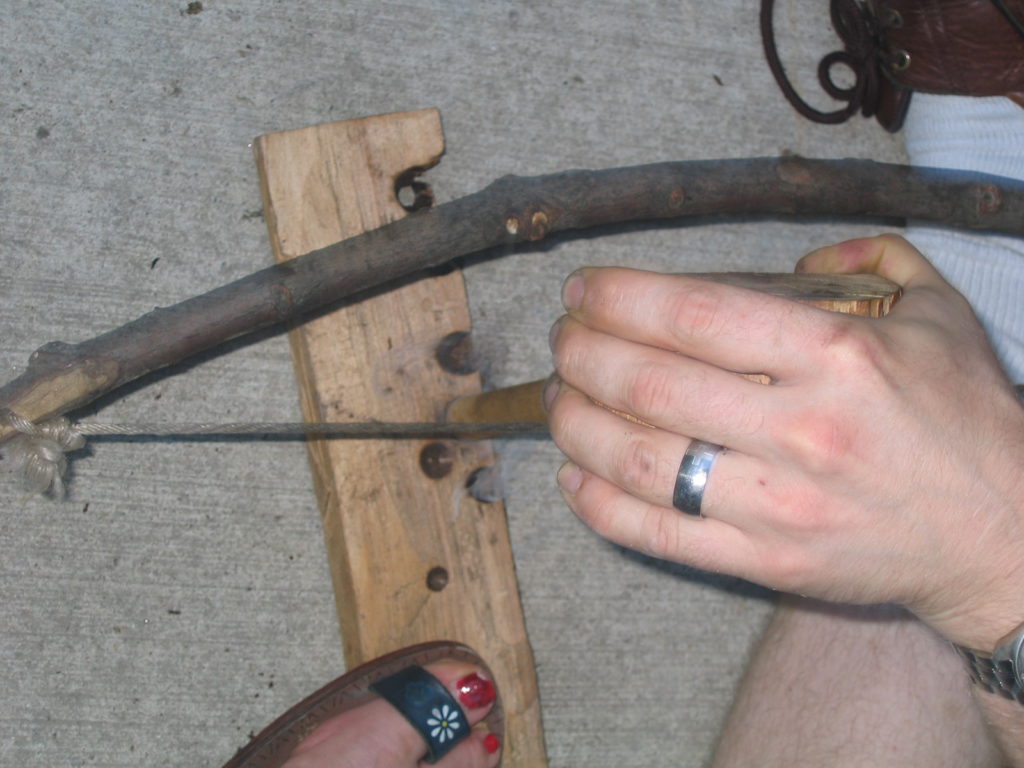
Starting a fire the old fashioned way.
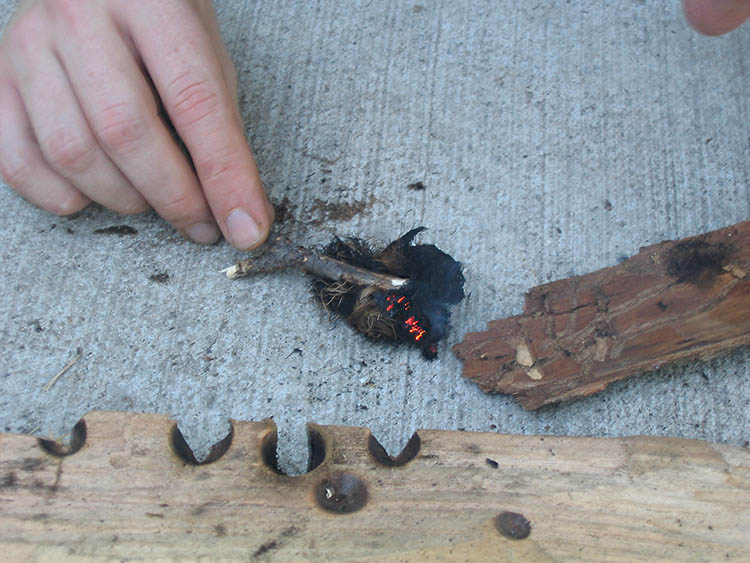
The seed of a fire: the glowing coal.
By the way, when God sees a flicker of life within us, a dim spark of hope within possibly shattered dreams and unfulfilled expectations, and even possibly the wreckage left behind a myriad of poor decisions, He won’t cast us off. He’ll take that smoldering ember and breathe life into it, fanning it into a flame.
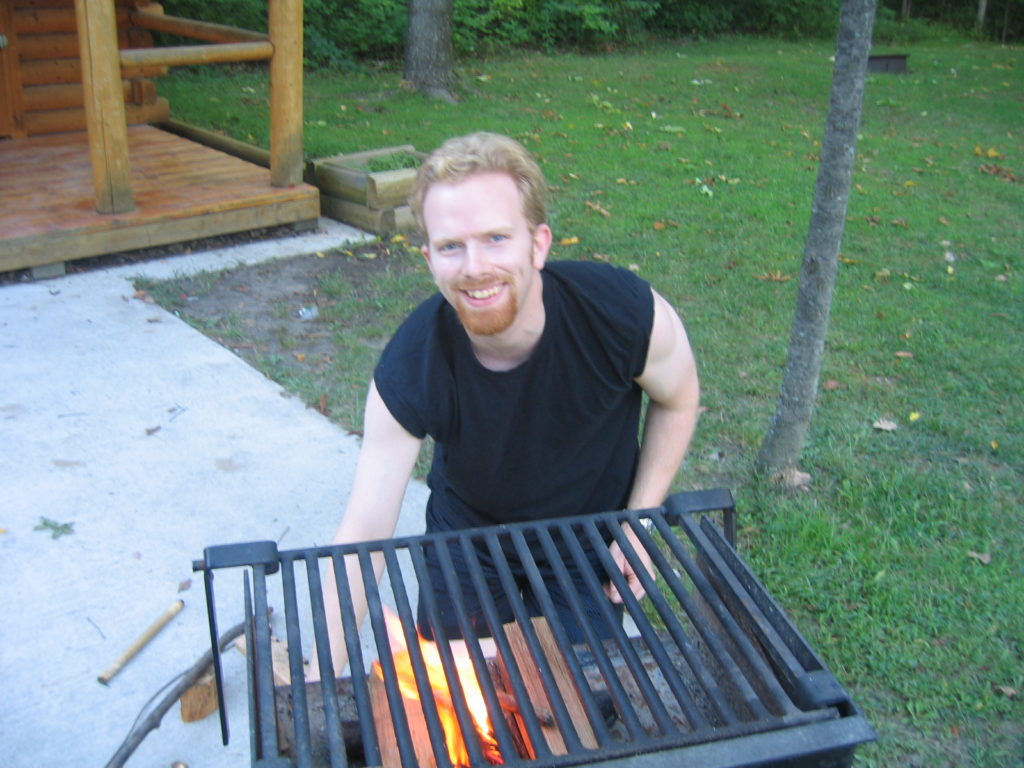
Fire ready to cook on!
It’s wonderful to be warmed and to cook over a fire that you made with your bare hands! And when you top off that meal with a nice toasted marshmallow enjoyed in good company, it doesn’t get much better than that!
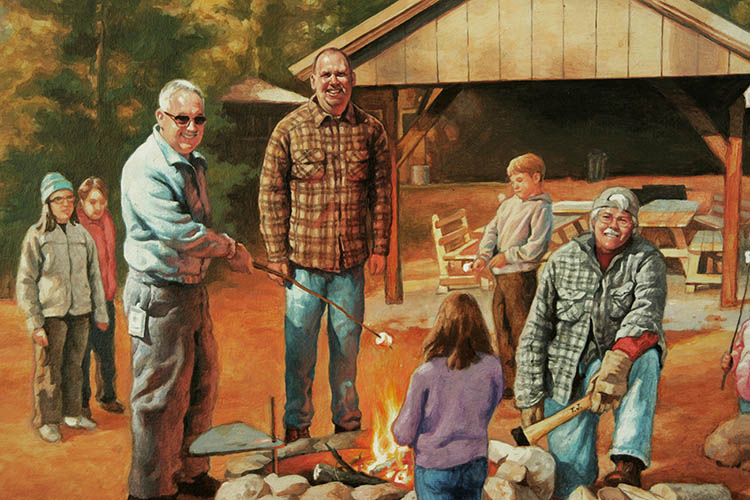
Here is a portion of a mural I did for the Merrill School Forest, commemorating some of the folks that volunteered their time and talents to encourage children to appreciate nature.

Portion of the School Forest Mural, 4′ x 6′ Acrylic on Hardboard, by Matt Philleo
If you haven’t already, get out there and enjoy God’s creation and spend time with your friends and family with a camping trip! Are there any interesting camping experiences you’d like to share? Let me know!
Share Your Thoughts!
If you have any comments or questions about this post, please leave me your feedback below! I will personally get back to you. Can you help me spread the word? Please share this post with your family and friends by using the social media links on the side or below. Thank you!

by Matt Philleo | May 25, 2016 | New Artwork
I just finished a new drawing last week, a pencil portrait sketch commissioned by a previous client. This drawing was to be given as a gift for his girlfriend, most likely a belated, but very special Mother’s Day gift.
It’s an 11 x 14, pencil on paper.
I took two different photos and combined them into one drawing. The girl on the bottom wasn’t shown in the original photo of the mother and her younger daughter, so I added that in from another photo.
The nice thing about a portrait drawing is that you can combine different photos together into one cohesive image. This is a great image of a beautiful mom with her two smiling children, and it was wonderful to be able to create this unique sketch for my client.
With this, I think of Mother’s Day that we just recently celebrated, and how amazing mothers are. All the pain they go through to bring a child into the world, the commitment to nurse and care for that child immediately after, and all the love they pour out into their children’s life day by day is nothing short of heroic.
Speaking of heroic, I remember several years ago, when my son was just months old, my wife and I were walking from a restaurant, and she was carrying him and some other stuff, too. (What was I doing? Probably nothing!) She tripped on a divot in the sidewalk and our son went flying out of her arms. Almost like a wide receiver stretching to catch a low pass, my wife adroitly reached out her hand just in time, cupping our baby’s head from what would have been the deadly impact of concrete. She still has a scar on her hand to this day, a testament to her instinctive, selfless sacrifice.
The only thing I could blurt out was, “Nice save.”
These days, a mother wears a lot of hats. Not only does she take care of the children and the home, but she also often has to work outside the home as well to make sure her childrens’ needs are met.
All of that and she still has to deal with her husband leaving his dirty socks on the floor. Mothers are amazing!
Share Your Thoughts!
If you have any comments or questions about this post, please leave me your feedback below! I will personally get back to you. Can you help me spread the word? Please share this post with your family and friends by using the social media links on the side or below. Thank you!
by Matt Philleo | May 17, 2016 | Encouraging Thoughts, New Artwork
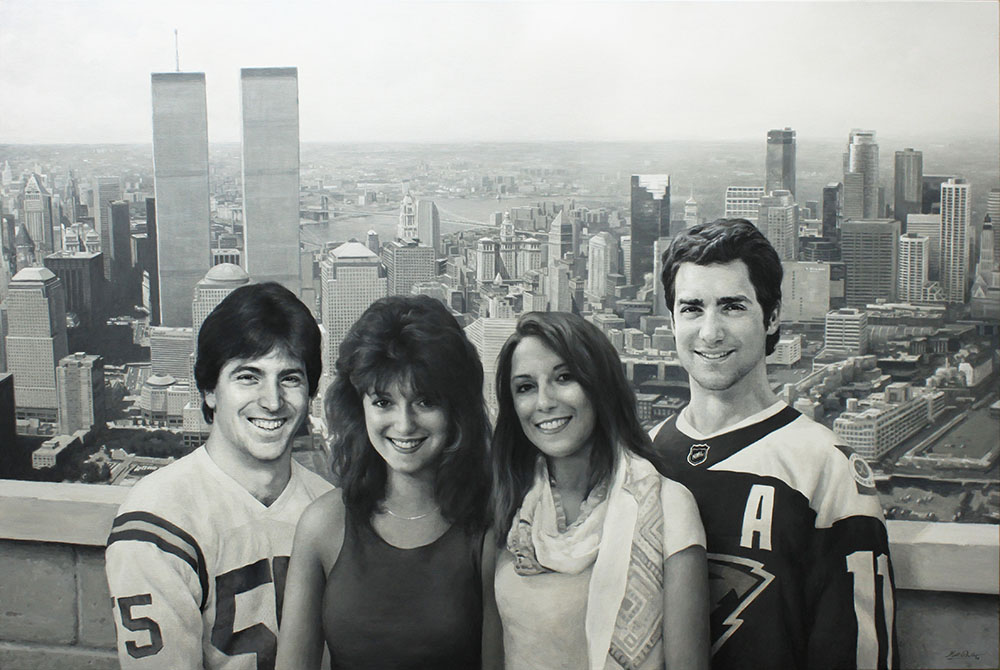
Finally, after three months of intense work, I finished my largest canvas painting ever: a 48″ x 72.” Although I worked on some other projects during the creation of this one, this particular portrait consumed the brunt of my focus–and studio space since the middle of winter.
The concept for this portrait painting was about as unique and intriguing as I’ve ever done, and it certainly was a privilege to be able to bring this idea to life for my client.
I made contact with him originally through the freelance/ self-employment web service, Thumbtack. Jim, my client, saw the profile I had there, and contacted me asking if I could do a portrait of his family. The concept he wanted was a depiction of his wife when they were in their 20’s back in the 80’s, and and their children–who are now in their 20’s–hanging out in the same time and place. In the background is New York City, where they were originally from, merging into Minneapolis, which is close to where they and their kids now live.
This was an idea I just couldn’t pass up.
As a freelance artist, I often take commissions that are your typical portrait based off a “polaroid” style snapshot photo, nothing fancy. Although I enjoy all of these projects because I love to capture the beauty in every person, this idea transcended the mundane, and I was thrilled to be able to bring it to life.
I have often wondered myself what it would have been like to hang out with my dad, for example, when he was my age. Would we be friends? What would we talk about? What kind of things would we do together?
The connection between who we were in the past, often overlooked, is vital to know where we are going.
This identity has a strong correlation with our children, since they in many ways are an offshoot of us. Not only do they share the same DNA, but in growing up with us and learning our habits, we see things in them– both positive and negative–that can help us to take a closer look at ourselves.

Coffee: my drink of choice to get the creative juices flowing.
Jim and I conversed online for a while and at the end of January we got together, along with his wife, Chris, and met over a cup of coffee in Hudson, WI. They decided to go with a 48″ x 72″ size–large enough to fit them, their two kids, and the cities skylines together in one dynamic and cohesive image.
After that, Jim sent me some photos of his family and I got to work putting together a layout of what the painting would look like when finished. It always helps to have a good-looking family to do your painting from! Jim kind of reminds me of Scott Baio or Tony Danza in these photos. 😎
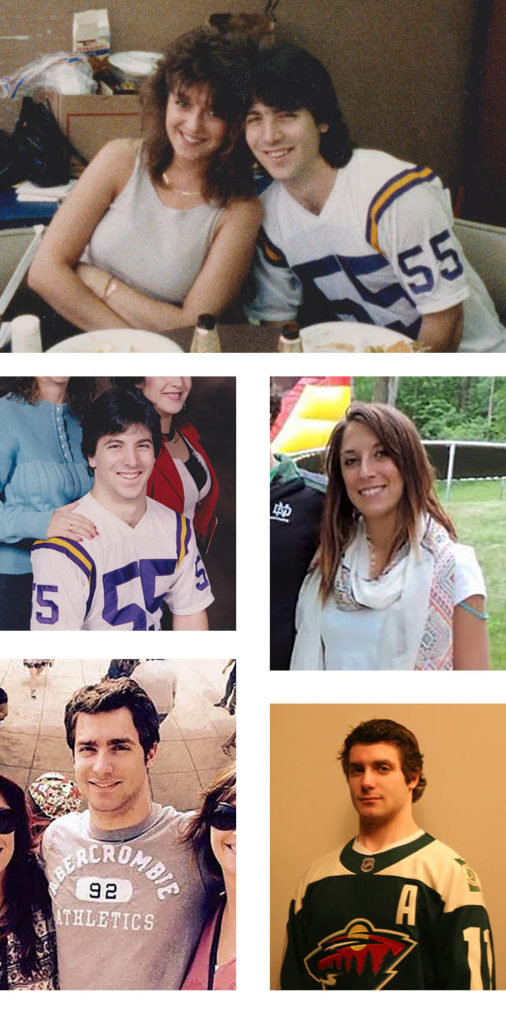
Some of the photos from the client that I used to create this portrait.
Most of the time, I use Photoshop now instead of sketching out a design. It’s beneficial both for me and the customers. They have a stronger visual aid to tell what it should look like, and I have a blueprint to create the actual painting from. Also, making changes in the layout is a snap with Photoshop. You can simply move layers around, alter the photos, increase sizes, cut and paste.
I love it.
Here is the layout I created.
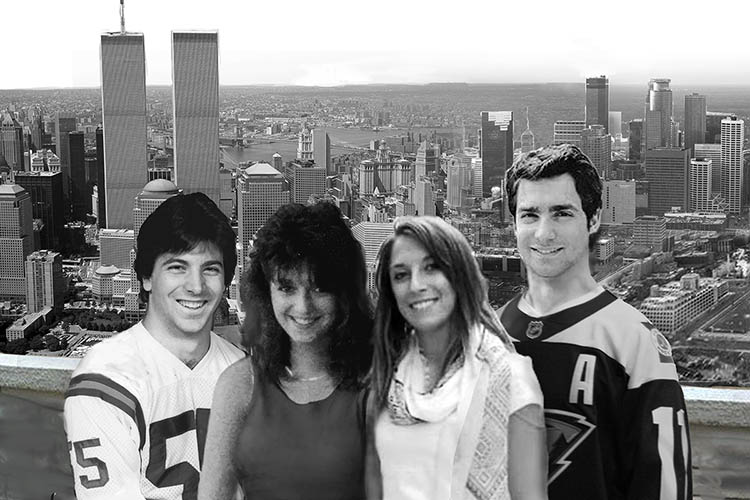
The final layout of the portrait that I created on Photoshop.
During the layout and approval process, I also worked on building the canvas. I started with professional stretcher bars made in the USA, complete with locking mitre joints and beveled edges, and assembled them. It is extremely important to have a strong support for a 4″ x 6″ canvas, to be able to withstand the tension of the stretched fabric, and to keep from warping. I made sure to include cross braces and diagonal braces as well.
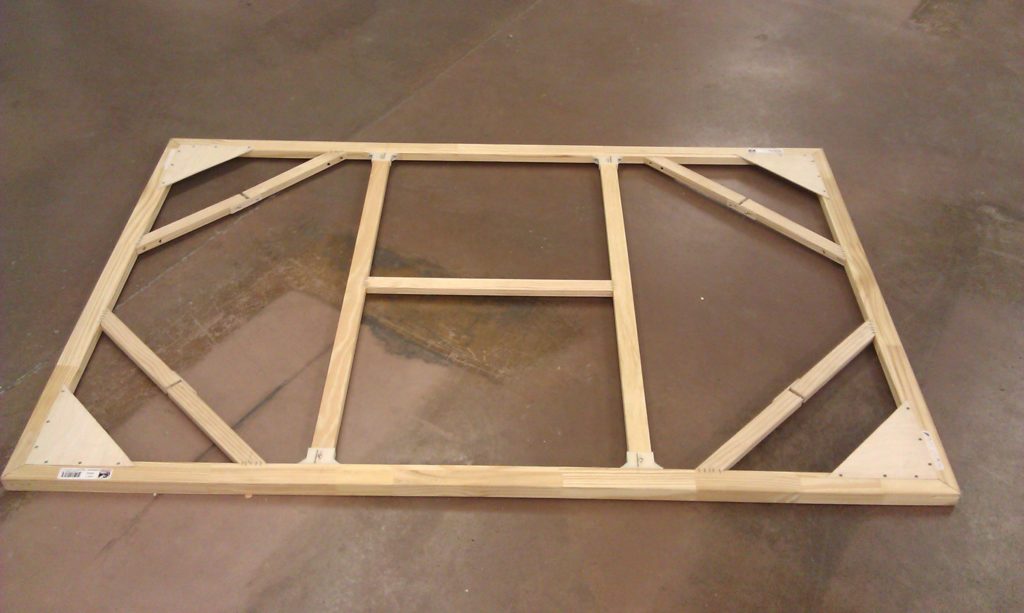
The completed 48″ x 72″ canvas stretcher frame.
Next, I stretched the canvas with pliers and stapled it extremely carefully, measuring every mark to ensure even tension. Just this process alone took several hours.
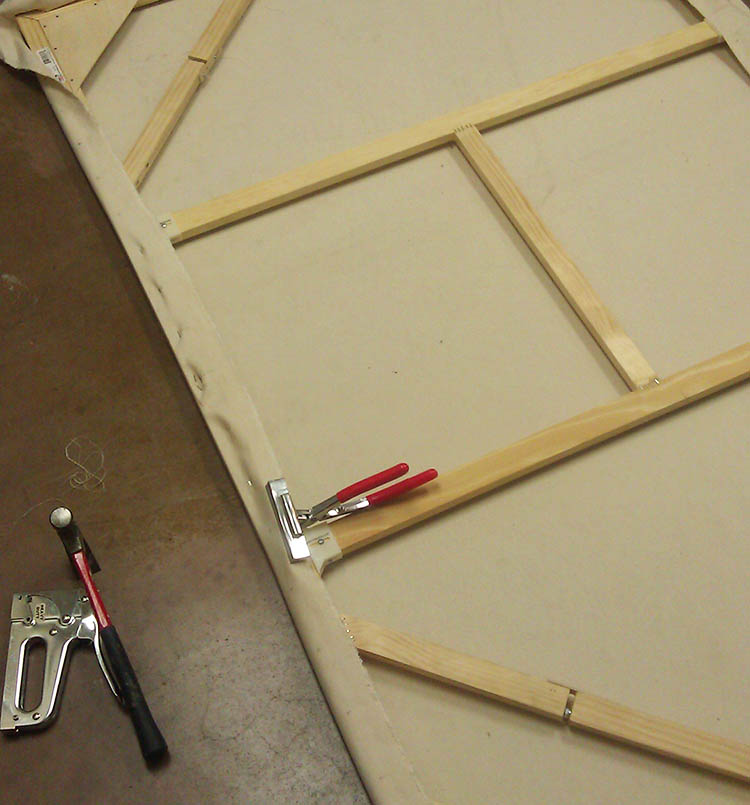
Stretching the canvas.
Finally, the stretched canvas! I apply hot water with a brush to add just a bit more tension and get out any wrinkles. If you tap it, it sounds like a drum!
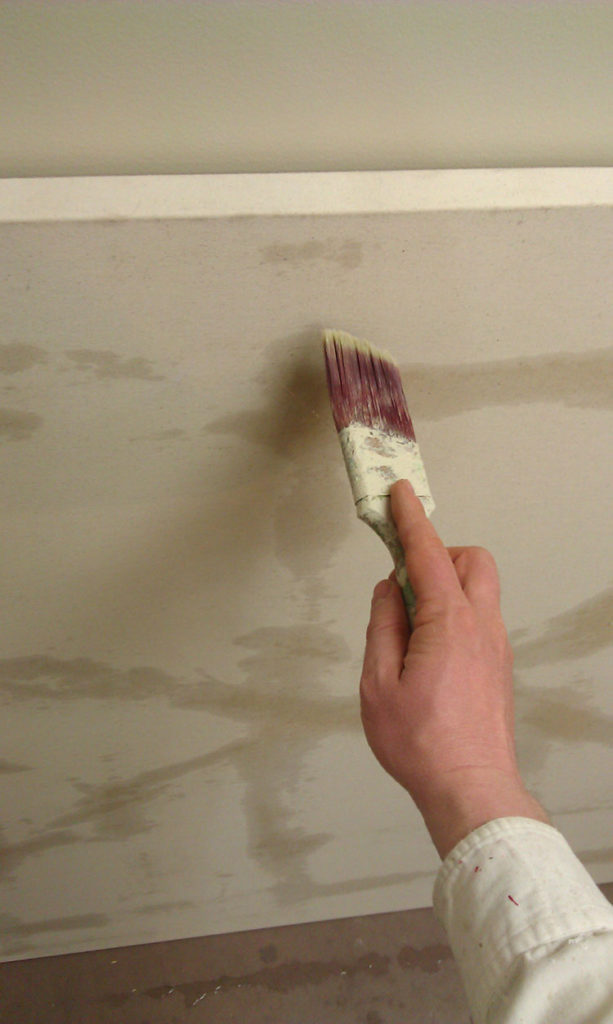
Tightening the canvas with water.
The next step was to gesso (prime) the canvas. I use a high quality gesso, which is white acrylic paint plus ground pumice to make it sandable. I used three or four coats to get a really smooth and durable surface.
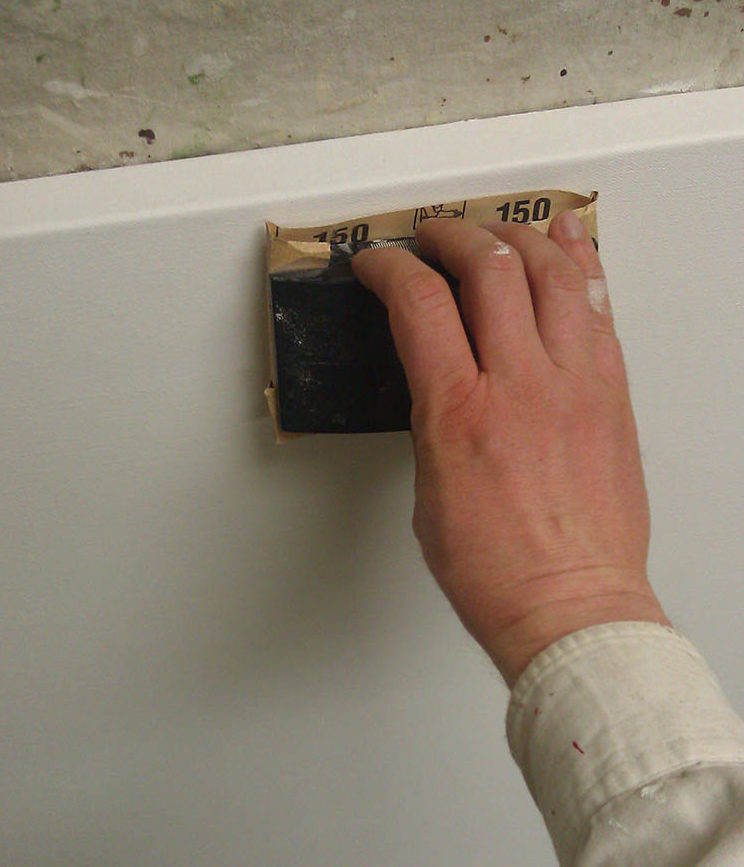
Sanding the gesso.
With a blank canvas to work with, I feel good.
It doesn’t feel daunting. It’s like a clean slate, ready to add something beautiful and intricate to. It makes me think of what God does in our lives when He forgives our sins through Jesus Christ, and then we are clean, perfect, and ready for Him to work with us to create a masterpiece!
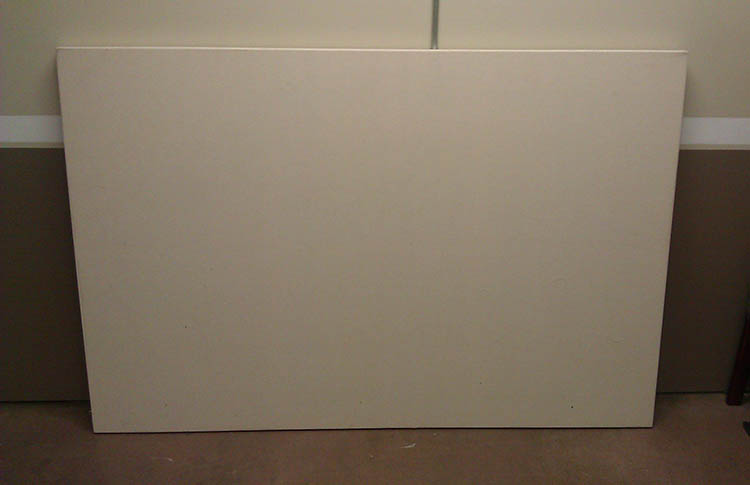
It was around the beginning of March when I started painting. Jim and his family approved the layout after a few changes, and so I was ready to go! I decided to skip the pencil sketch, and get into the painting process right away.
Many people ask me how I do the sketching process. It depends on the project. Most often for small portraits, I freehand sketch them. For a large scale and incredibly detailed project like this on a canvas, I will either grid or project the design with an overhead transparency projector. Canvas is very difficult to sketch on with a pencil. In this case, I projected the design I created in Photoshop, using a small brush and a grey paint to quickly capture the lines of the image.
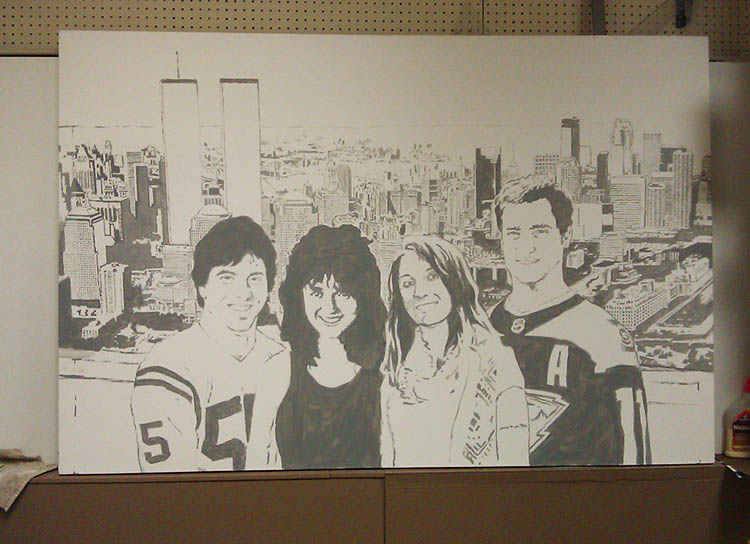
The painted “sketch”
Next, I painted a glaze over the entire painting, to give me a mid-value grey tone to work from. I add in darker values and highlights, working my way across from left to right. I try to develop the painting as a whole and not get too hung up in any one area.
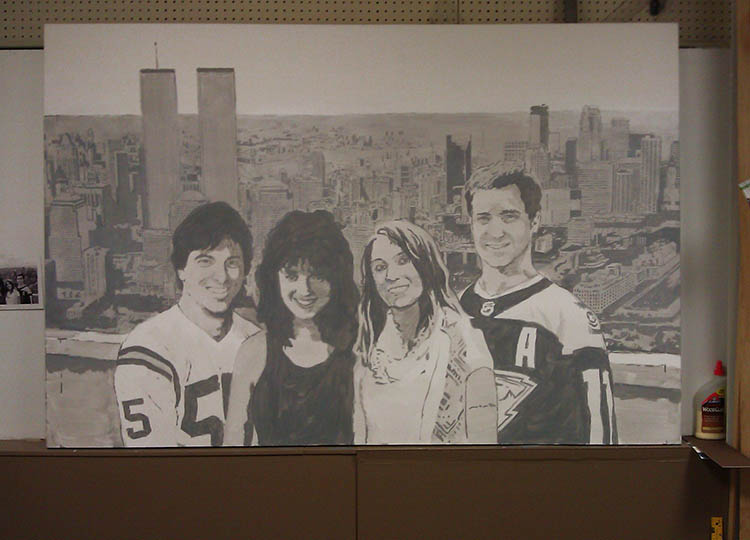
Building in the tones and values.
It took over fifty hours to paint the background. I thought I was making it too dark, and had to constantly remind myself that the subjects, the people in the front would be much darker, with areas of pure black paint, and make the background look lighter by comparison. I wanted to “fix the background” and try to lighten it up, but I kept telling myself, “just wait until you paint the people.”
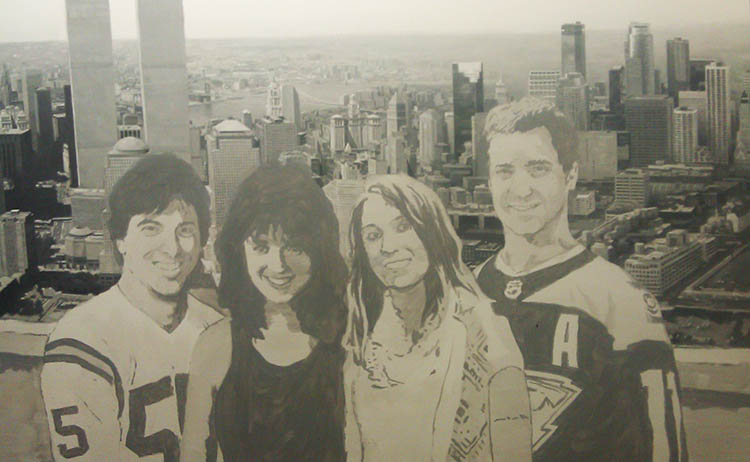
Background nearly finished.
How often in our lives do we judge something or someone prematurely? We ought to reserve judgment on many things in our lives, and especially in others’ lives, believing the best, and wait until everything shakes out. God has a purpose and a plan that we don’t always see. Things can look horribly wrong, when God is creating something wonderful behind the scenes.
In the next post on this painting, I’ll show you a little more of the process in how I wrapped this project up and share a few more insights.
Share Your Thoughts!
If you have any comments or questions about this post, please leave me your feedback below! I will personally get back to you. Can you help me spread the word? Please share this post with your family and friends by using the social media links on the side or below. Thank you!
by Matt Philleo | May 2, 2016 | How to Draw Instruction
As many of my readers know, I just started teaching my very first drawing class at my studio this week. I created a 5-session course to help beginning artists learn skills that will help them create realistic, detailed portraits they can be proud of.
Since I normally am a “fly-by-the-seat-of-my-pants” kind of guy, I figured I would do better and create an intricate, elaborate lesson plan with 50-some drawing exercises (a little exaggeration) and that the students could knock them out in about 10-15 minutes. No problem, right?
Man, I am glad I only had one student.
It took me and and my student way, way longer to do these exercises than I had anticipated.
We had 5 exercises planned for the first two-hour session and only got the second one partway done!
Time to regroup.
Instead of trying to create several mediocre drawings, I am now shooting for the students in my class–well, in this case, one–to create just two really great drawings. And I”ll teach him every trick I know.
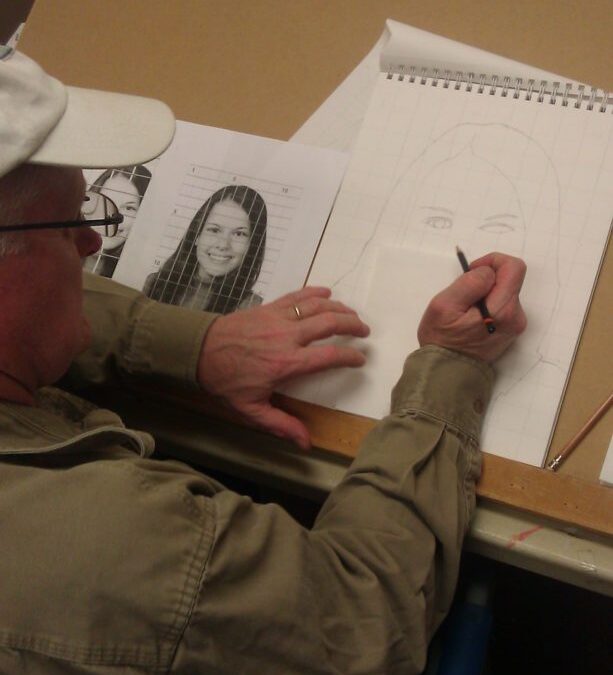
But so far, my student Tim, who is a professional taxidermist (you need some art skills to paint fish and deer mounts) did a good job on his first portrait attempt, based off a photo of young woman. Here it is in progress, after a little over an hour’s work. Not bad!
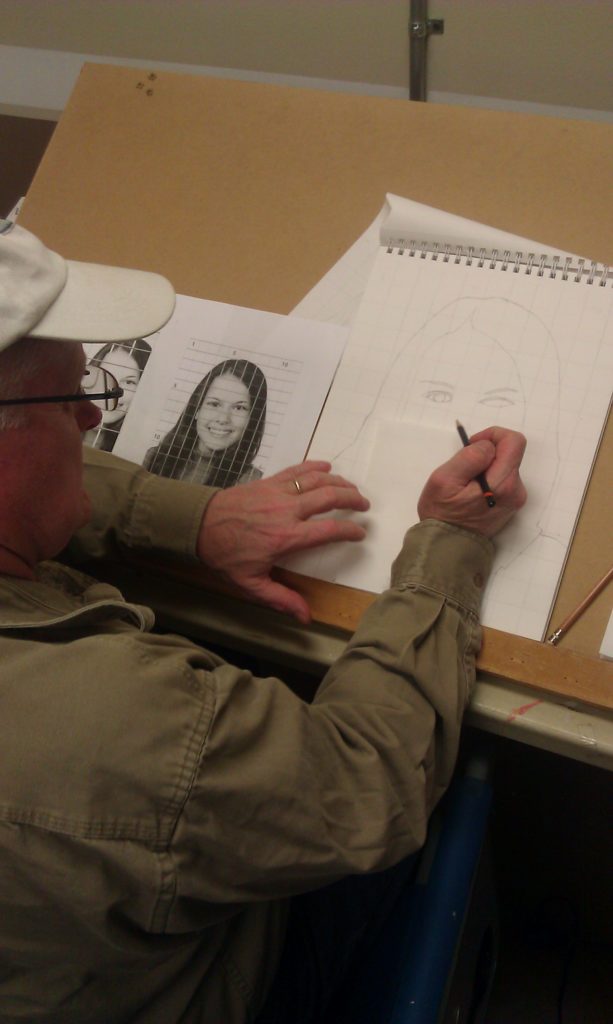
My student, Tim P., working on a pencil portrait
We start by using the grid method to gain proficiency in drawing what you actually see instead of what you think you see. Did you know Michaelangelo used this method to sketch in the composition for the Sistine Chapel? If it was good enough for him, it’s good enough for me!
In the coming week (today), we will shade this drawing in. After that, we’ll have the student create a drawing from one of his own photographs, and fully shade it in with tone and value. That way, he will end up with a fantastic drawing that is personally memorable to him, and something he’ll be proud of!
In an upcoming post, after I teach it in the class, I am going to share with you in depth, how I approach shading and value in a portrait sketch, and hopefully give you some tips if you like to draw.
But for now, I’m learning more is not always better. Sometimes it’s better to teach a few things well, than to teach many things poorly. And the same thing goes with learning, too! I am learning how to teach art–this is new thing for me.
We are all a work in progress.
Share Your Thoughts!
If you have any comments or questions about this post, please leave me your feedback below! I will personally get back to you. Can you help me spread the word? Please share this post with your family and friends by using the social media links on the side or below. Thank you!
by Matt Philleo | Apr 22, 2016 | How to Draw Instruction
People are one of the most challenging things for an artist to draw. To capture the unique appearance and personality of a person by using the right lines and shading takes patience and practice. Even as a professional portrait artist who loves his craft, sometimes after drawing dozens of faces a day at live events, it would be much easier to draw the tree behind the person sitting in front of me!
From childhood, we learn to draw people a certain way, an expected way. But it is not the most realistic way.
Far from it.
Here is a picture of how most of us learn to draw people.
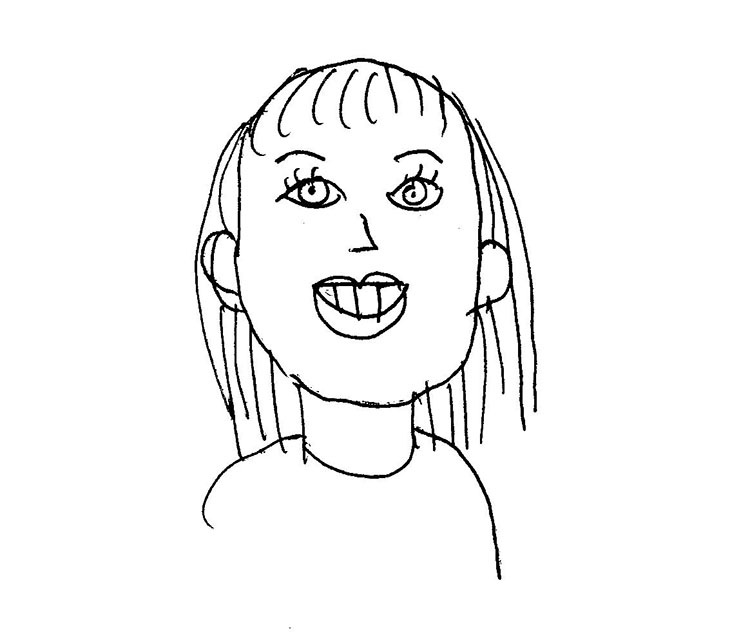
“A Strange Face”, pen on paper, by Matt Philleo
Even if you are not an artist, I’m sure you can tell this isn’t a very good drawing. I can say that freely, because I’m the artist who did it!
Here we have the eyes, with extra long cartoony eyelashes at the top of the head, an inverted “L” for a nose, and a funky-looking mouth.
Probably the biggest mistake people make when trying to draw a face is putting the eyes at the top of the head. Actually eyes are somewhere in the middle.
Next, the nose is best drawn by observing the contours of the nostrils and the thickness of the nose bridge and drawing those lines instead.
Finally, the mouth, especially when smiling, needs the cheekbones and wrinkles, along with squinting eyes to give the appearance of actually smiling.
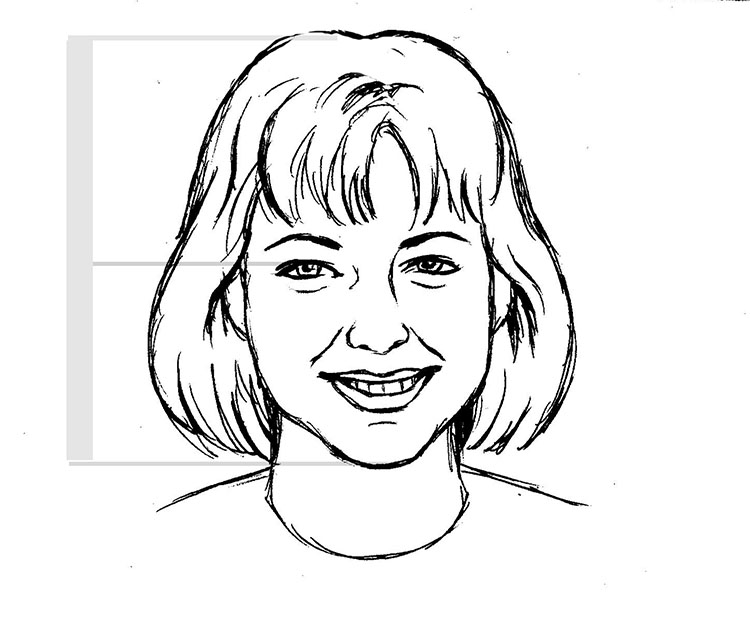
“A Better Face,” pen on paper, by Matt Philleo
Here is that same face, drawn with more lifelike proportions and shapes.
To draw realistically, you have to strive to draw what you see instead of what you think you see.
Your brain will play tricks on you.
It still does on me.
For example, I will find myself subconsciously smoothing out the shape of a crooked eyebrow, because smooth things are usually better. But if a person has a crooked eyebrow, it’s better not to try to be smarter than the photograph (or the person in front of you) or it won’t look right.
This takes practice, and a training of your eyes and mind to observe what you see in the three-dimensional world (or even two-dimensional rendition of the three dimensional world, a.k.a., the photograph) and transfer that onto paper. Although some people are more gifted with this ability and this skill comes more naturally, I think everyone that wants to learn how to draw can benefit from training in this way.
As an artist, your talent is not in your hands; it’s in your mind and soul.
I can become a better artist without even having to pick up a pencil or paintbrush.
How?
As I see people in various settings, with interesting expressions and lighting on their faces, I make a mental note and think of how that could be rendered on paper or canvas. When the time comes to draw or paint, my mind already has some visual material to to work with, and I have part of the technique already ironed out beforehand.
By the way, I will be teaching a drawing course at my studio at Artisan Forge Studios, where we start off at beginning level and move to more advanced techniques. Using your own photos as references, you will be able to create some portraits you can be proud of and show your friends and family at the end. The cost per two hour session is $40 and the class runs for five weeks, starting Monday April 25th, 6-8pm and going every Monday after that until May 23rd.
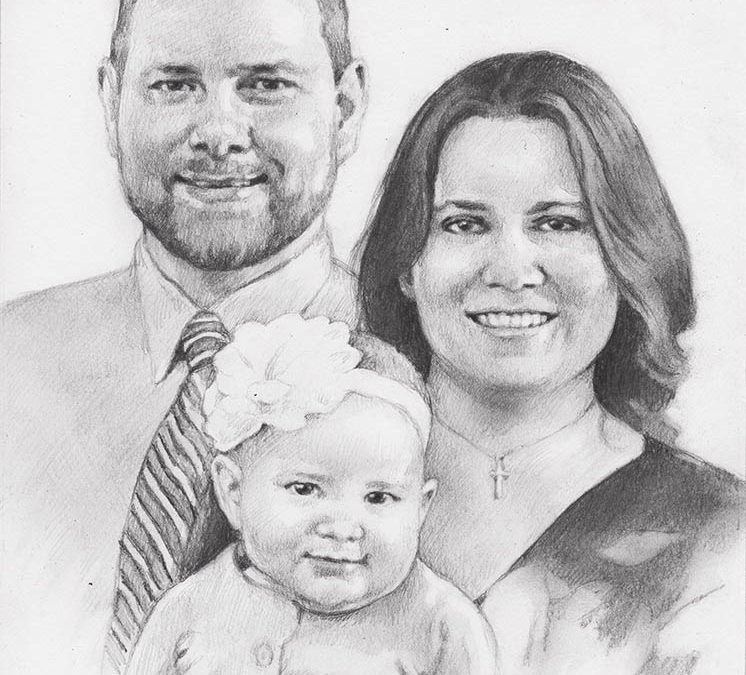
Here is a sketch I did of my brother and his family for Christmas. It took about 2-3 hours. Once you learn how to accurately draw proportions using line, you can get into shading and detail. That is something I plan to cover in another blog post.
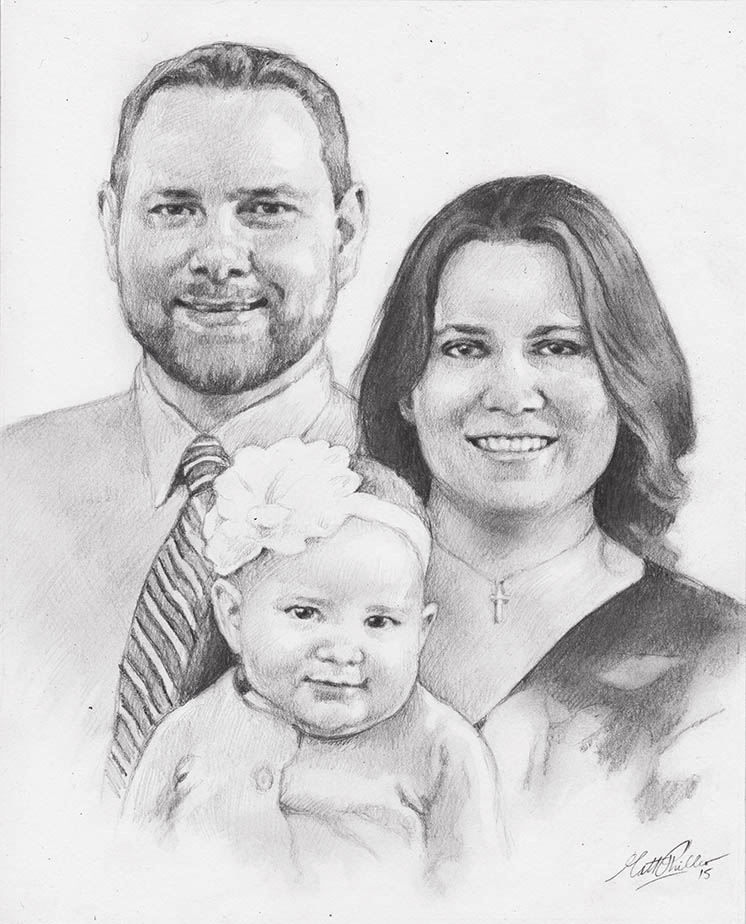
Portrait of Mike Philleo and family, 11 x 14, pencil on paper by pencil portrait artist Matt Philleo
Meanwhile, if you like to draw or are interested in learning how people draw realistically, I hope these tips help you. Let me know if there’s anything you’d like to know more about!
Share Your Thoughts!
If you have any comments or questions about this post, please leave me your feedback below! I will personally get back to you. Can you help me spread the word? Please share this post with your family and friends by using the social media links on the side or below. Thank you!


Recent Comments