by Matt Philleo | Apr 15, 2017 | Christianity & Culture, Encouraging Thoughts, How to Paint Instruction, My Art in Progress, Personal Inspiring Stories, Tips for Artists
It’s easy to get frustrated in the middle of painting an acrylic portrait. Possibly your skin tones aren’t looking natural, or the values are off. Maybe the portrait just doesn’t look like the person you’re trying to capture. When you’re going for realism, and it just isn’t happening, what do you do?
Although you may be tempted to give up, don’t.
I want to give you 3 reasons why:
1. You will save time, paint and materials.
Let’s face it. Painting is a labor of love. As artists, we could choose more lucrative jobs, where our exchange of time for money paid better. But we put a lot of hours into creating a high-quality unique work of art.
So if you have put several hours into a painting only to scrap it and start over, you lost that time. In addition, you lost money with the cost of canvas, paint, and wear and tear on your brushes.
Now, even if you paint just as a hobby, it’s frustrating to take the time to create something and then have nothing to show for that time you allotted in your busy schedule. Finishing the painting makes sense then, even from a purely material standpoint.
2. Pushing past a difficult point in your painting will build your resilience and grow your “artistic muscle”.
It’s easy to give up. Sticking with something when your thoughts and emotions are screaming, “This looks terrible…I’m done with this!” is way, way harder.
This is similar to weightlifting. Serious bodybuilders know they won’t get great results unless they push past the pain. As they break down their muscle tissue, they also break down barriers and limitations they previously had. With that, their muscles grow larger and stronger, because muscles don’t like to be in pain. Endurance and stamina increases.
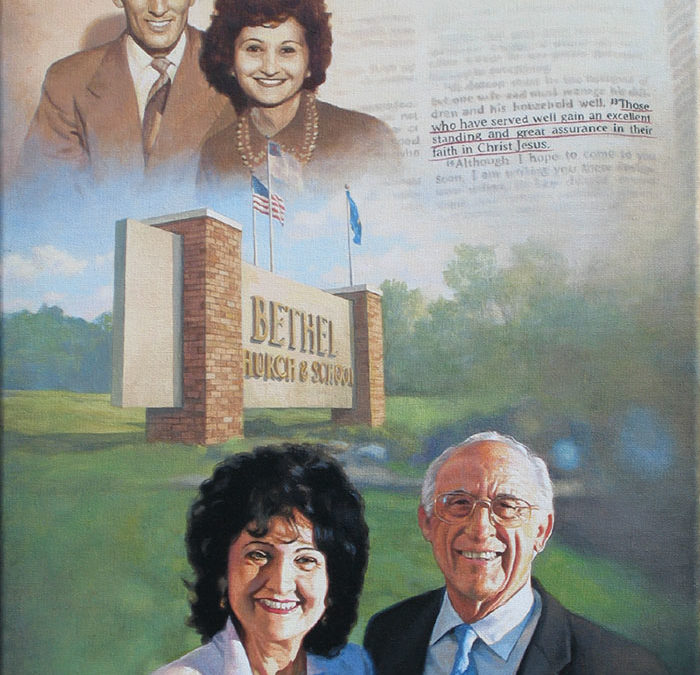
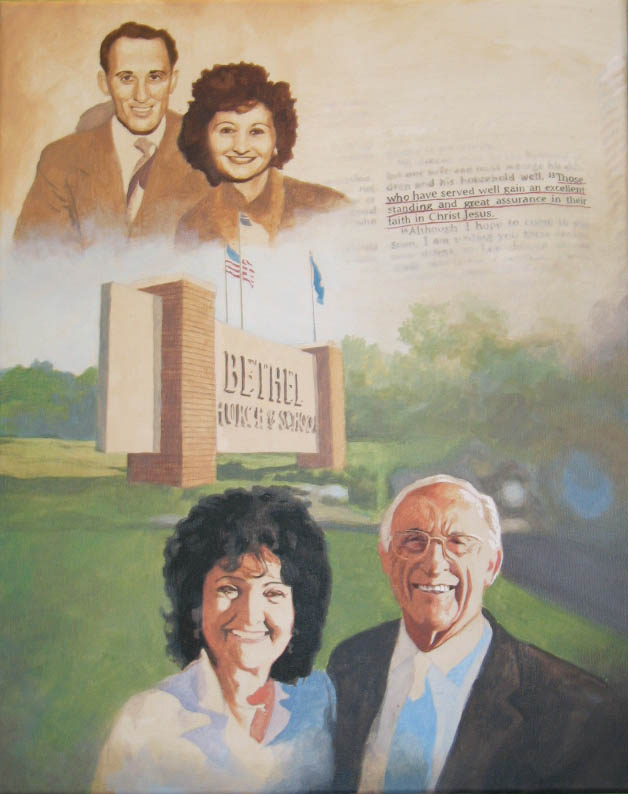
Several years ago, I created a portrait to celebrate my pastor’s 80th birthday. It was a portrait of him and his wife, a 16 x 20 acrylic on canvas. During a certain point in the painting, it looked pretty bad. My wife came upstairs (where my art studio used to be) and peered in to see how I was doing. She said, “That just doesn’t look right. I don’t know if you can pull it off.”
Umm…thanks!
I thought for a moment, “Can I pull this off?” Well, God helped me to “pull it off” many times. He wasn’t about to quit now. I ignored the doubt and kept at it.
I figured I had a photo that shows me what it should look like. I had a roadmap, a blueprint to tell me how to get there, how to build. And even if I took a scenic detour for a bit, I’d get it where it needed to be, eventually.
A painting is never ruined. It’s just that it might take longer to fix than you would like!
3. You will learn ways of resolving issues in your painting that you can use in future paintings.
In the case of this particular portrait, I learned that even though mid-stage during the painting process, the likeness of the subject may be off, I can correct the facial features with additional layers and it will start to look like the person.
Here is the portrait in the beginning stages. Early on, there is a lot of excitement in creating a painting. I had great expectations for how it would turn out, and I cut myself a lot of slack, because I knew I just started it.
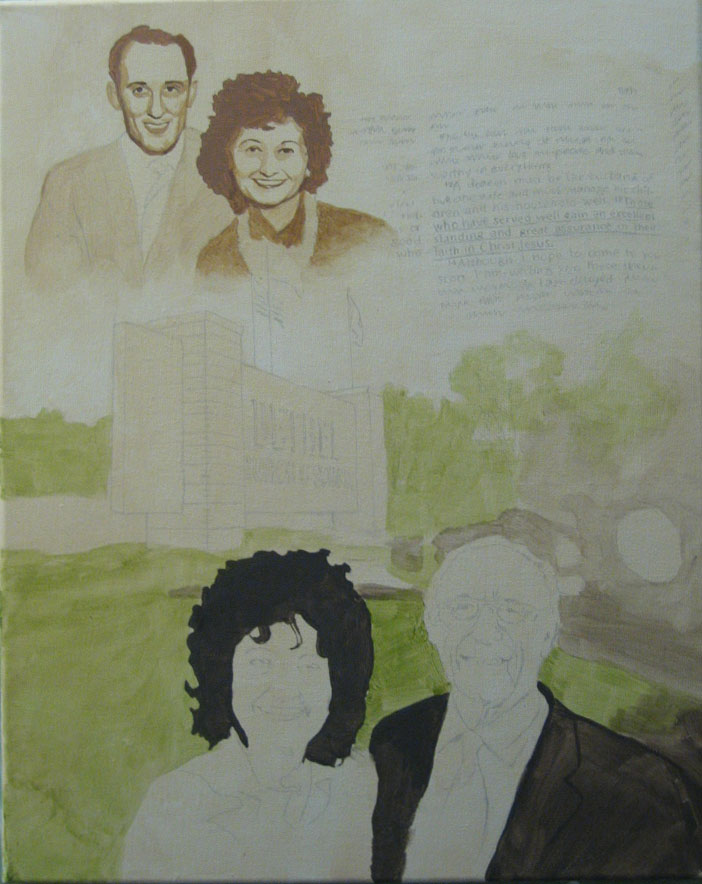
Portrait of Pastor & Mrs. Philip Palser, 16 x 20, acrylic on canvas, 2005 by fine artist Matt Philleo, Step 1
But then as I invest more time into it, I expect that a painting should start “behaving” and looking pretty good, for all the time I put into it. However, that doesn’t always happen. In fact, for me, it usually doesn’t.
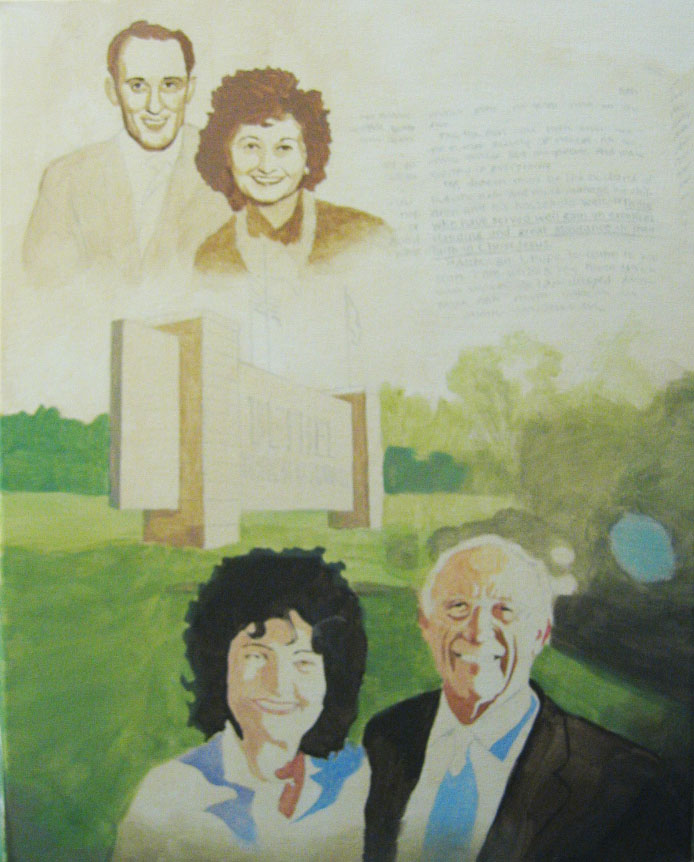
Portrait of Pastor & Mrs. Philip Palser, 16 x 20, acrylic on canvas, 2005 by fine artist Matt Philleo, Step 2
Somewhere around these two stages. the painting looked pretty goofy, and it’s about at this point where my wife remarked, “I don’t know if you can pull this one off.” She said that the pastor’s wife looked like some weird “california girl.”
Even though I was tempted for a moment to give up, I thought something along the lines of, “I know what this needs to look like in the end. I’ve got my reference photo next to me. I’ve got some paint and a palette. Sooner or later, it’s going to look like it should and it will turn out alright.”
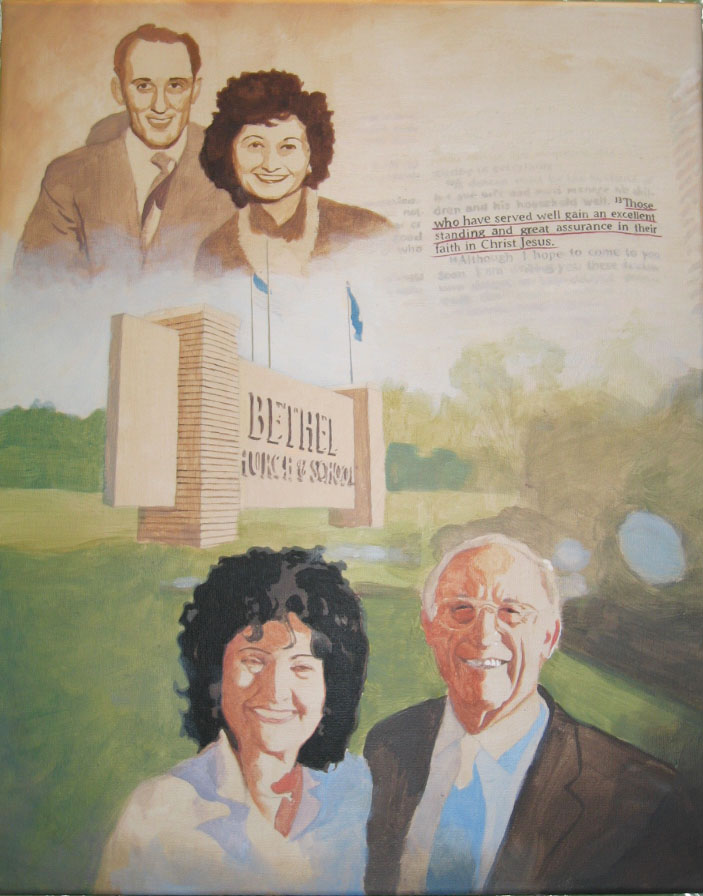
Portrait of Pastor & Mrs. Philip Palser, 16 x 20, acrylic on canvas, 2005 by fine artist Matt Philleo, Step 3
After a few more hours, the painting started to turn the corner. Even though I think I had painted certain areas of the faces a bit too dark, I was able to layer over them with just the right mix of colors to adjust what was off.
When you are establishing values and colors on your faces, sometimes the accuracy you had in your sketch will be thrown off. Capturing these shadows are vital to making a person’s face look like the person you are trying to capture. Since shadows describe the contours and shapes of eyebrow ridges, noses, cheekbones, jawlines, and so many other parts on a human face, it’s important to realize that during the in-between stages, you won’t have an accurate likeness. It’s like a sculptor who has to chisel off many fragments of marble or wood to get the beautiful sculpture that was hiding inside the whole time.
Soon enough, I could see the likenesses taking shape.
That excitement of certain areas of the picture starting to look great then compels you to work even harder to get to the finish line of a signed portrait.
Portrait of Pastor & Mrs. Philip Palser, 16 x 20, acrylic on canvas, 2005 by fine artist Matt Philleo, Step 4
There was still a lot of detail work to do: many nuances to add in the clothing, details in the face and bricks in the church sign. It took a lot of patience, but it paid off. After about 35-40 hours, I had a finished painting!
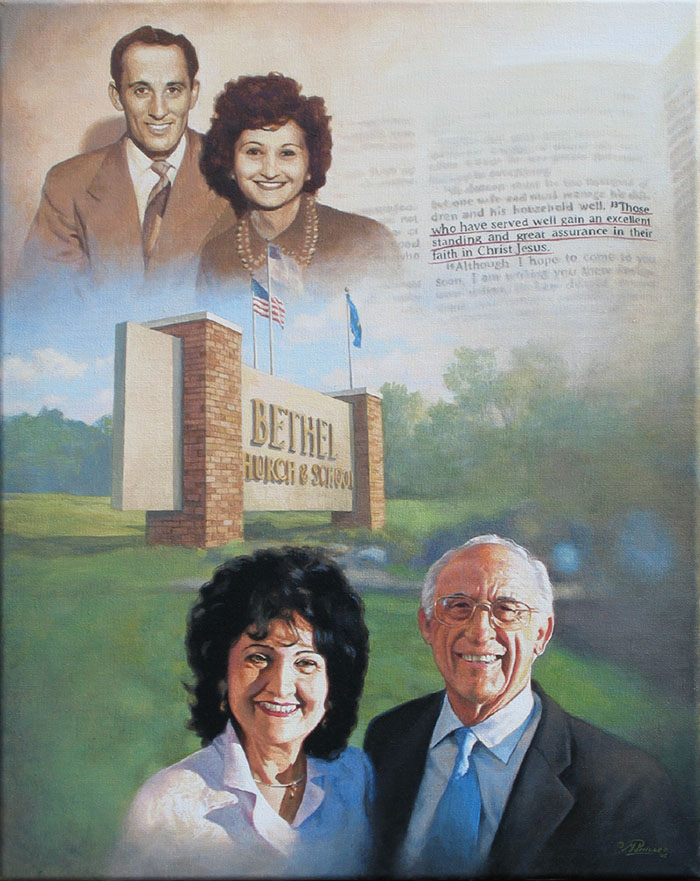
Portrait of Pastor & Mrs. Philip Palser, 16 x 20, acrylic on canvas, 2005 by fine artist Matt Philleo
I presented this to my pastor and his wife at his 80th birthday party. They loved it. That was 12 years ago, by the way. He is now 92, and still preaches (although not as much as he used to) today!
So again, I want to encourage you: if you are painting a portrait in acrylic, the next time you feel like giving up at a certain part in the process, push past it and keep going. Continually refer back to your reference photo, and paint exactly what you see. If you don’t give up, you will have the confidence knowing that you can finish what you started, and your paintings will never get the best of you. But you will give your paintings the best, and have something excellent to show for your efforts.
I’m writing this post on Good Friday, and this whole idea of finishing what you started, pushing past the difficulty, and seeing what good can come as a result, makes me think of Jesus’ passion. He could have decided as the going got tough–incredibly tough–knowing in advance what He would endure on the cross, to abandon his plan of providing salvation for the world by dying on the cross for our sins.
But instead, he headed for Jerusalem, knowing what would happen to Him there.
In the garden of Gethsemane, when it would have been easier to turn away from the preordained plan of experiencing God’s wrath for sin and even having His relationship with His father broken for a time, he prayed, “Not my will, but yours be done.”
And three days later, we all know…”the rest of the story.”
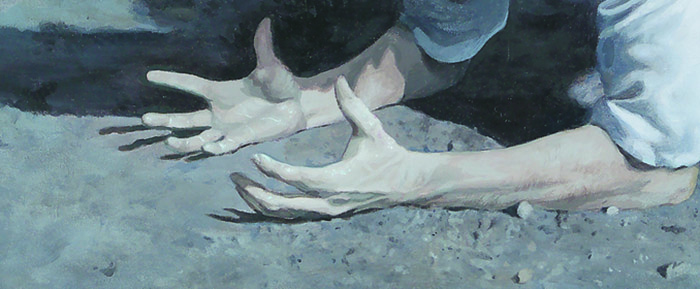
Portion of “Perfect Servant,” acrylic on canvas, 2002, by Matt Philleo
All this to say, there is great reward for not giving up, both in this life and the next. Happy Easter…and Happy painting!

–Matt
Share Your Thoughts!
If you have any comments or questions about what I wrote, please leave me your feedback below at the very bottom of the page! I will personally get back to you. Can you help me spread the word? Please share this post with your family and friends by using the social media links on the side or at the bottom of this page. Thank you!
by Matt Philleo | Nov 25, 2016 | Art Shows, Encouraging Thoughts, How to Paint Instruction, My Art in Progress, New Artwork, Tips for Artists
Hope you had a great Thanksgiving. I know I did. It was rejuvenating to take a little time off from the studio, and spend it with family. Sometimes as an artist, you feel the crunch of having to create a lot of artwork, and your creative energies get tapped out. Thanksgiving’s a fantastic time to recharge, give thanks to God for all the blessings He’s given, be with family, and of course, eat a wonderful home-cooked meal.
Back to the studio tomorrow.
While teaching art classes lately, I’ve discovered one of the most challenging things for my students to learn is how to shade.
For artists and art appreciators, shading is a mysterious thing. We wonder how to do it, or how others did it.
Shading– the transition from a dark value to a lighter value in a two-dimensional work of art–is one of the most important techniques you can master to make a painting or drawing look realistic.
I’d like to share a video (hosted on YouTube) I created earlier this week about that, with you. This is my first art instructional video–in fact really the first serious video recording I’ve done, since the old days of playing around with a VHS-C camcorder with my buddies after school. We made some pretty crazy movies back then!
Somewhere towards the end of the video–maybe about 2/3 of the way through–is where I really get into it: how to do shading with acrylic and make it look real.
Hope you enjoy this video, and let me know if it helps you in your painting. Let me know, too, how I can improve it in any way, so going forward I can create some videos that are more helpful, or informative for you. Or maybe you don’t paint, but you are interested in the process of acrylic painting. Again, let me know if you’d like to see more stuff like this in the future!
And of course, as I always ask, please share this with your friends! Thanks!
Blessings,
Matt
P.S. I will have the painting featured in the video on display at the art show this Saturday at my studio. (1106 Mondovi Rd, in Eau Claire, 10-4pm)
Share Your Thoughts!
If you have any comments or questions about this post, please leave me your feedback at the very bottom of this page! I will personally get back to you. Can you help me spread the word? Please share this post with your family and friends by using the social media links on the side or below. Thank you!
by Matt Philleo | Aug 9, 2016 | Tips for Artists
One of the biggest costs for a painter is the canvas and, of course, the paint. I’ve been painting for over 20 years and during that time, I’ve had many fine brands of acrylic to choose from like Liquitex, Windsor & Newton, and Golden. But tubes of paint are crazy expensive.
In 1999, I got turned on to Nova Color paint by a muralist from Los Angeles. Nova Color manufactures and sells their own high quality paint, comparable to the name brands, out of California, and ships it direct to artists, cutting out the middleman–and the huge price tag.
I can buy a pint (16 oz) of paint for the same price as a 6 oz tube at the local art store. Big savings.
And big mess.
The only problem was that Nova Color ships their paint in jars, not tubes. Tubes are nice. You can squeeze just the amount of paint you need onto the palette.
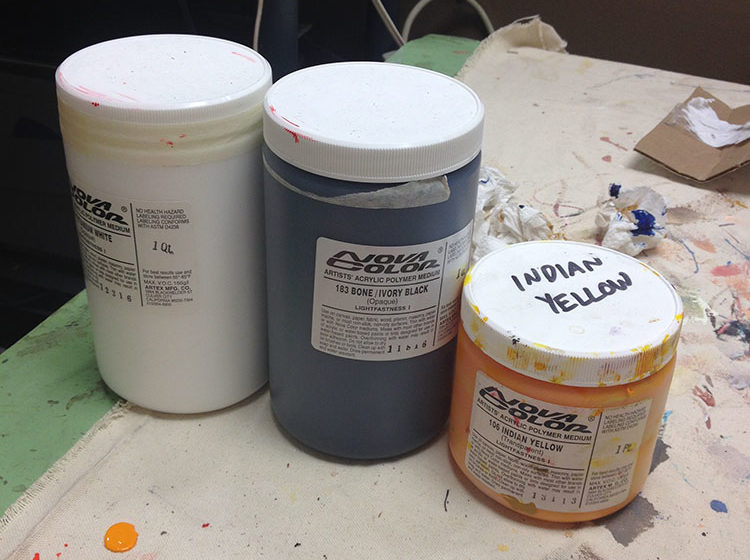
Nova Color paint in quart and pint sized jars.
With jars, the only way to apply the paint onto your canvas is with a spoon. And that gets very, very messy. And you waste paint every time you load up your palette. And so preparing my palette is something I have grown to hate. I sometimes endure nearly dried gobs of paint rather than scoop fresh paint from the jar.
The solution.
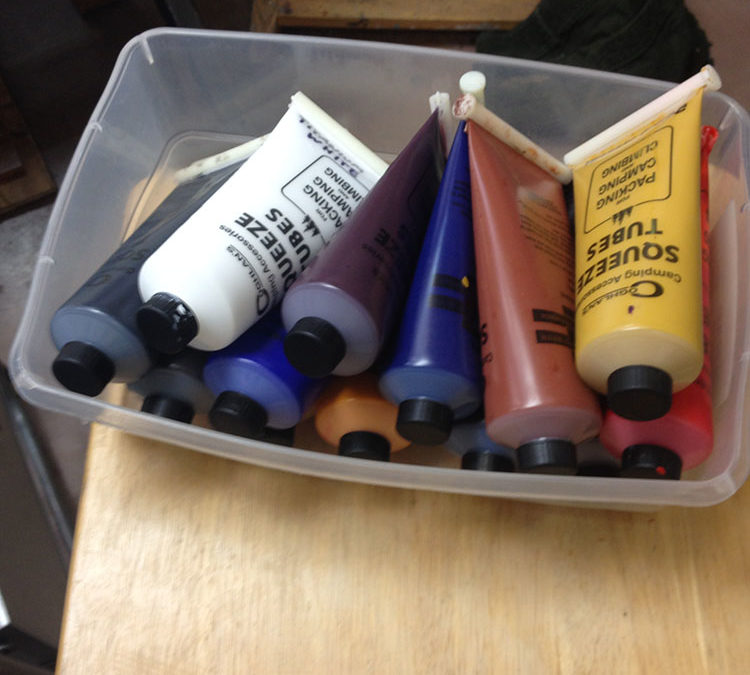
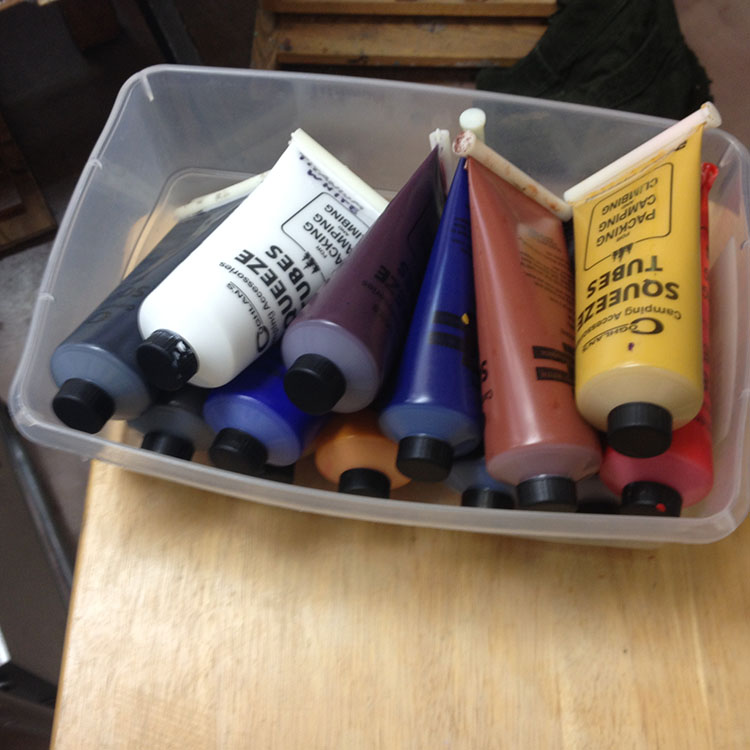
Finally, after 15 years, I found a a way to get rid of the mess and waste: refillable squeeze tubes. They weren’t easy to find, but I purchased some squeezable tubes online at REI.com that people use for camping and travel. They work perfect for paint.
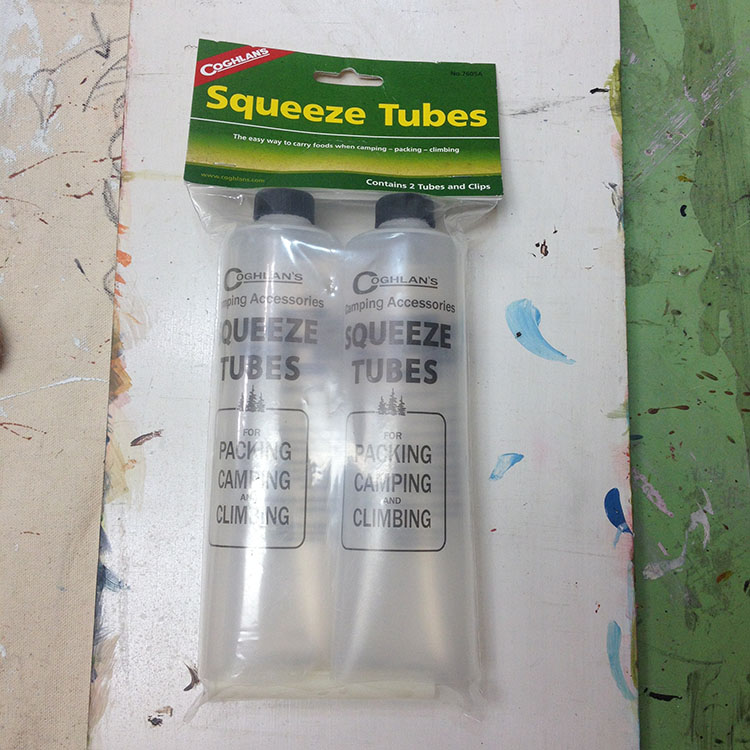
Squeeze tubes that you can use for acrylic paint from REI.com
You just open the end, pour in the paint, and crimp it to seal.
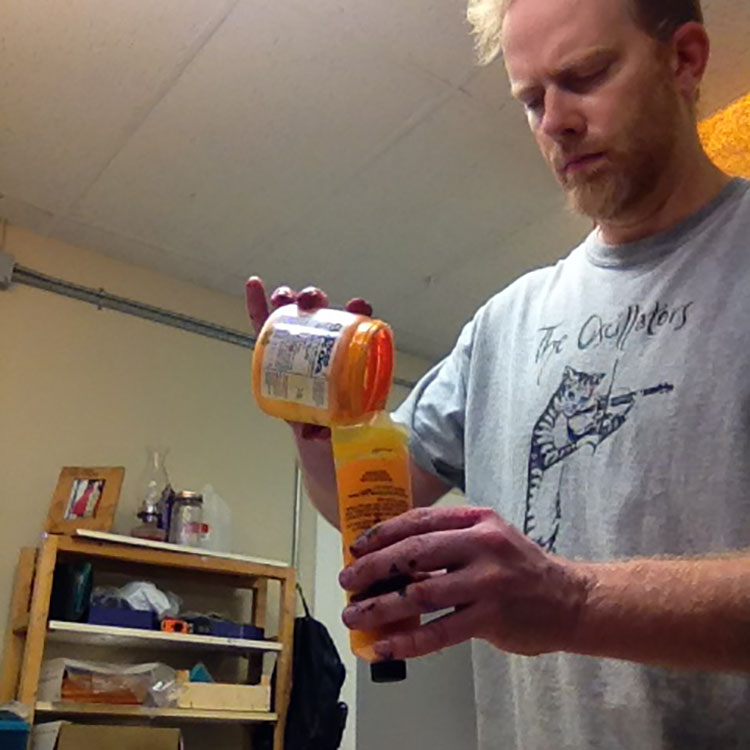
Pouring paint into refillable tubes from REI.com
Done. Now I have reusable paint tubes with high quality, low priced paint.
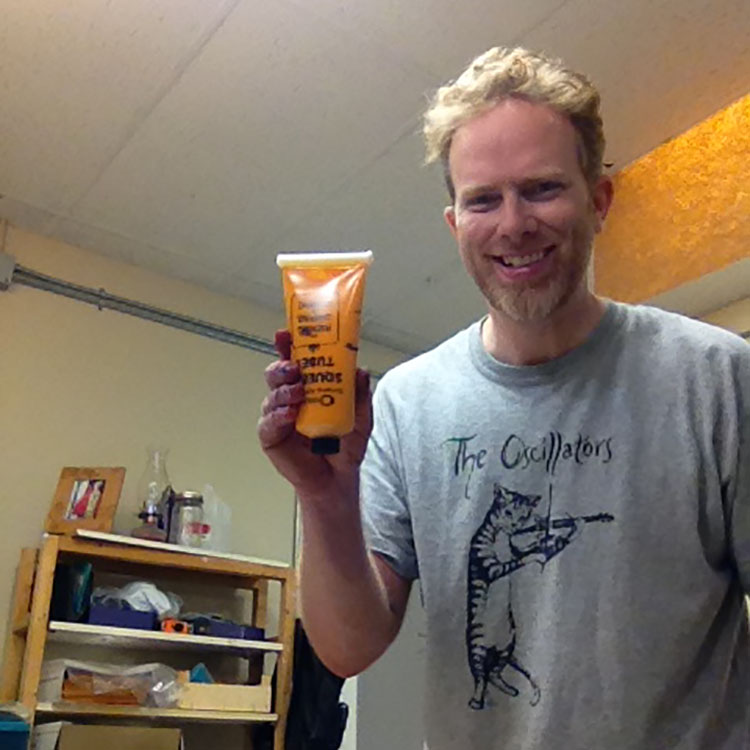
Finished tube of paint.
I’m loving preparing my palette.
I think I’m going to go paint now.
Share Your Thoughts!
If you have any comments or questions about this post, please leave me your feedback below! I will personally get back to you. Can you help me spread the word? Please share this post with your family and friends by using the social media links on the side or below. Thank you!
by Matt Philleo | Oct 21, 2015 | Tips for Art Appreciators, Tips for Artists, Tips for Collectors
I always smile a bit to myself when I have my artwork at a show, and a child reaches out to touch one of my paintings.
“No! Don’t touch that!” the parent scolds.
I don’t want to minimize the parent’s admonition, but I try to reassure them that the painting isn’t as delicate as they assume.
In Western culture, from our experiences encountering centuries-old masterpieces in museums, we are conditioned to give artwork its distance, and treat it as an ancient archeological relic.
Granted, I do try to show my artwork respect–because it is valuable–and not allow the surface to get scuffed or otherwise abused, but I know the medium I use, and it’s very resilient. So on the one side, I want clients that purchase my original paintings to treat it with care (and almost everyone instinctively does) but I also want them to feel comfortable knowing the painting can live in a house where people cook, children play, pets shed, and life happens.
Ever since the Renaissance, oil paint was the standard medium for painting. It allowed for a long working time, brilliant color saturation and blending, but because it could get brittle over time, oil paintings had to be handled with great care.
Then, in the 1930’s acrylic paint was invented and became available to artists in the 1950’s. Acrylics are great because of their versatility. High quality acrylics such as Liquitex, Windsor & Newton, and the kind I use–NovaColor– are extremely flexible, non-yellowing, water resistant, and highly resistant to scratches once dry. Although I have tried oils, acrylic is my medium of choice.
Since I have painted in acrylics for over 20 years, I’ll speak from my experience with them. Here are some guidelines in displaying and caring for your acrylic painting.
1. You do not need glass to protect your painting.
I have seen some people put glass over their paintings when framing them. This isn’t necessary to protect it. I use a high quality 100% acrylic resin varnish on my paintings to protect them from scratches, sunlight, dust, and other minor debris. The varnish also enhances the depth of the colors and provides a smooth, even sheen that is easy to clean.
Glass actually inhibits the viewing of the painting, by adding glare and reflections. However, I do recommend glass to cover prints, because the paper in prints is so susceptible to warping from humidity changes, and cannot be easily cleaned once it gets dirty. But for paintings, the traditional–and best–look is always to frame the canvas without glass.
2. Hang your painting in a place where there is adequate light–but not too much light.
Paintings look best in light. Soft lighting from lamps looks great on a painting that has warmer, earth tone hues. Daylight tends to accent a painting with cool tones. Try to keep your painting from direct sunlight–even though acrylic paint stands up very well to UV rays, eventually over the years, the sun will win the battle if you don’t take the precaution. So minimize that as much as possible.
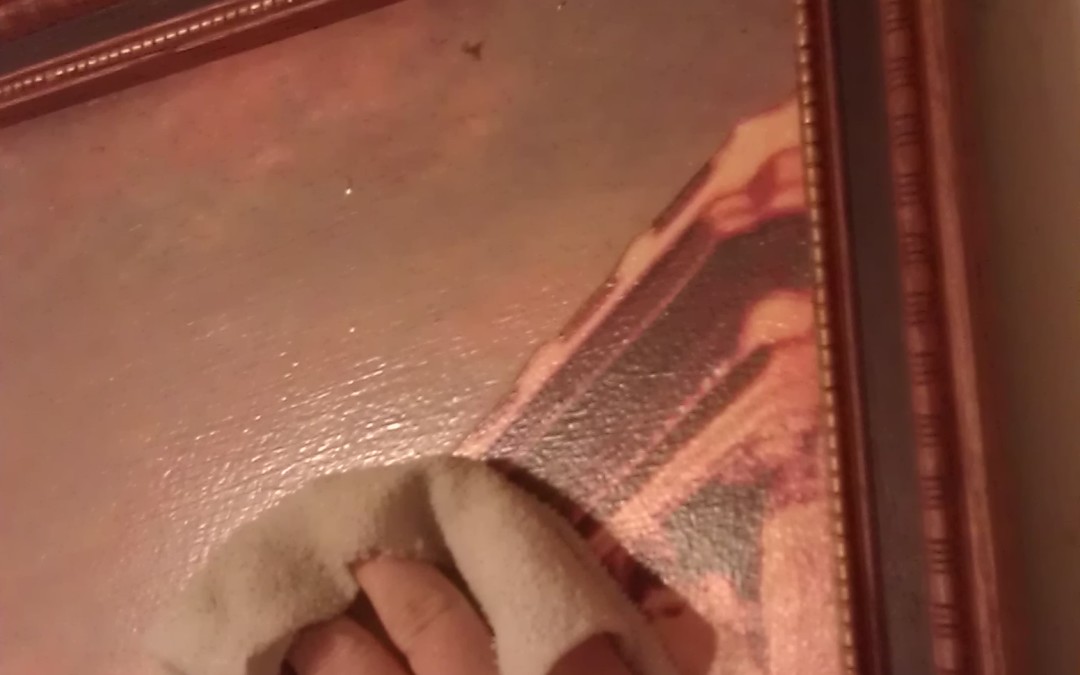
3. How to clean your acrylic painting.
Over time, dirt, dust, oils, and other particles will settle on the surface of your painting. If the painting has either extremely dark or light hues, it will become especially noticeable, and will lessen the visual contrast of the overall image.
To clean the surface, all you need to do is grab a soft cotton towel or cloth, dampen it with water and wipe the dust off in circular motions. If the dust is excessive, you may want to use a feather duster first. Grease can be cleaned with household vinegar and rinsed with water.
Never use ammonia, bleach, alcohol, turpentine, or any solvents to clean an acrylic painting. That will be a recipe for disaster!
Have you ever seen “Bean,” the movie with Rowan Atkinson?
You may remember how, as an incompetent museum guard, he was asked to give a speech on the famous painting “Whistler’s Mother.” While he was alone with painting, studying it, he tried to blow dust off the surface. Then, the dust made him sneeze. Of course, he sneezed all over the painting. Uh oh! So he grabbed a handkerchief from his pocket and delicately cleaned the moisture off the canvas.
He smiled, sighing a breath of relief.
But he neglected to notice that his hankie was covered with ink from a leaky pen, and so was the face of Whistler’s mother! Now he really freaked out! He took the painting to the janitor’s closet and wiped off the ink with paint thinner.
Thankfully, the ink came off…but so did the face! All that was left was the raw canvas beneath–Mr. Bean was in trouble now!
So, let Mr. Bean be a lesson to you: no solvents for paintings!
4. What if the painting gets damaged?
Damage to an acrylic painting rarely occurs, but I have seen it happen. In fact, it has happened to me.
I once was delivering a painting to an art show, and I apparently didn’t have it packaged well enough–and something punctured and gouged the front of the painting, leaving a deep scratch almost 4 inches long and 1/8″ wide! I didn’t have much time before the deadline to drop of the painting, but I was able to get some paint from my studio, and quickly match, fill and varnish the scratched area. To this day, you can hardly tell there was a scratch, unless I were to point it out to you.
Now, if you bought an acrylic painting from me, for example, and it were to get damaged, I would be more than happy to restore it, for a very reasonable fee. Depending on the damage and where it is on the painting, it is something I can usually fix in a few hours or less.
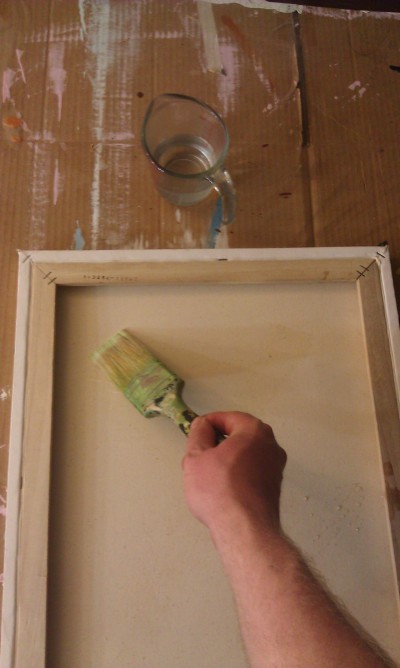
How to easily get a dent out of a stretched canvas
If your canvas gets dented, here is simple repair you can do yourself…
Simply boil about a cup of water in your microwave, grab a small household painter’s brush, and apply the hot water to the back (raw side) of the canvas approximately where the dent is and then paint an “X” across the back with the water.
You know how they tell you to never wash your cotton clothes in hot water because they’ll shrink? Well, in this case, that’s exactly what we want.
The hot water will cause the canvas to contract and with it, the dents will be pulled out. While wet, the canvas will be tight as a drum. After it dries, it will loosen a bit, but the dent will still be gone.
So again, should you decide to purchase an acrylic painting some time down the road, or you already own one, be confident that your investment is a wise one. Acrylic paintings are extremely archival–meaning, they are meant to last for a lifetime and more. With reasonable care, your original painting will be sure to become a treasured family heirloom!
Share Your Thoughts!
Let me know if you have any questions or comments on this post. I’ll personally get back to you. Also, could you help me spread the word? Please share this post with your friends and family, using the social media links on the sidebar or below. Thanks!
by Matt Philleo | Sep 23, 2015 | How to Paint Instruction, My Art in Progress, New Artwork, Tips for Artists
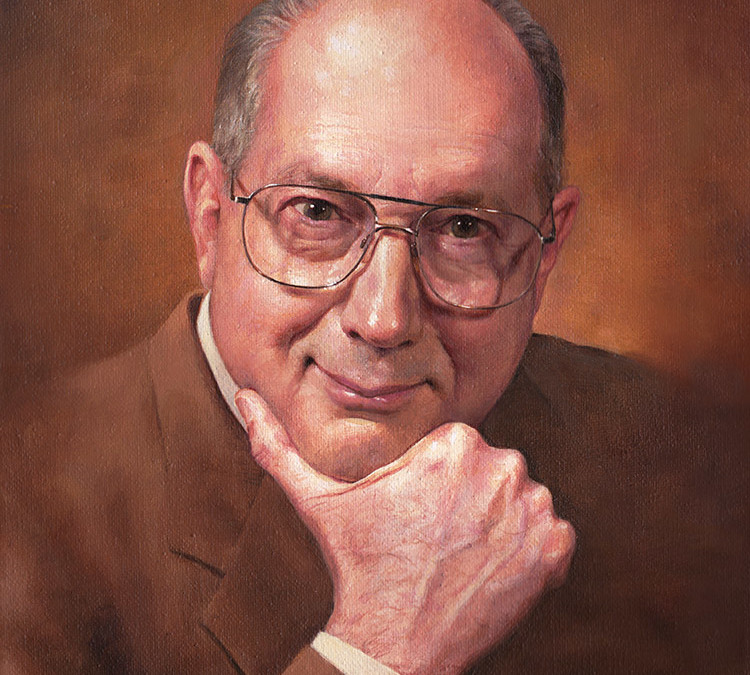
I have been doing commissioned portraits for 24 years, since I was in high school. One of the questions I’m often asked is: “How do you create your art?”
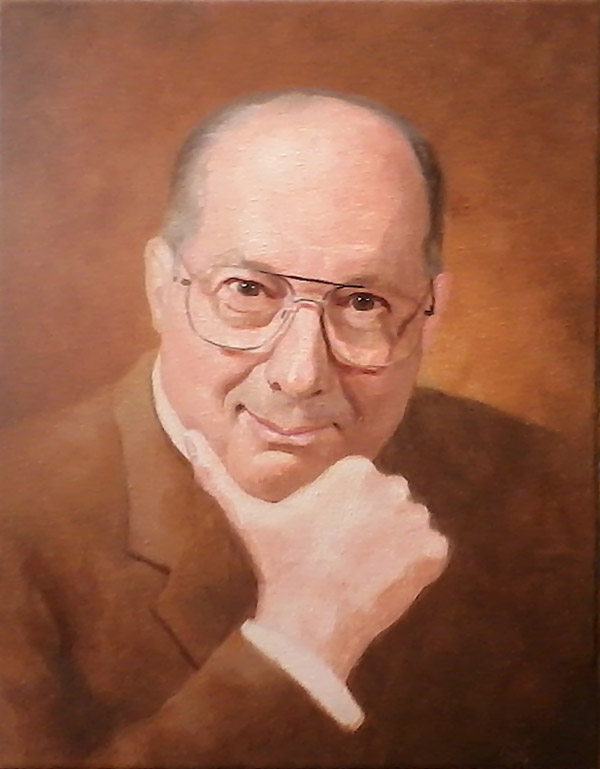
I am going to show you a recent portrait I did, step by step, and my hope is that you may be able to learn a few tips that will help you in your own portrait painting. Although I paint in acrylic, some of this information may help you even if you paint in oils. If you are not a painter, I hope this post will still be interesting to you! Who knows? You could even start painting today! For this particular example, my portrait was based off a great photo (which unfortunately I am unable to show since it was a professional photograph ) and it lent itself to a great painted portrait. Amateur snapshots can be used as a basis for a portrait, but unfortunately, the lighting and detail is usually lacking, so the image you create from them as an artist is similarly lacking in depth. Get the best photo you can, and your painting will be all the better for it. Step 1: Start Right With a SketchWithout a good sketch, you’re just shooting in the dark. The sketch is where you will create your composition, ensure the likeness of your subject–that is, make sure the person you’re painting looks like them–and define specific details.Be sure to center your subject on the surface of the canvas and if it is a head and shoulders portrait, the face should fill about 1/3-1/2 of the height of the canvas. Pay attention to the eyes and special details that make a person unique. Draw exactly what you see, not what you think you see. In the future, I plan on doing a lesson covering just the sketching/drawing aspect of portraiture, and there we will go more in depth on the process. Many artists find it difficult to sketch on canvas with a pencil. I do as well. Once pencil gets embedded in the canvas texture, it is extremely difficult to erase. You may be able to get away with a very light pencil (3H or lighter) but even then, you will still find it difficult to erase if you use a lot of pencil strokes like I do.
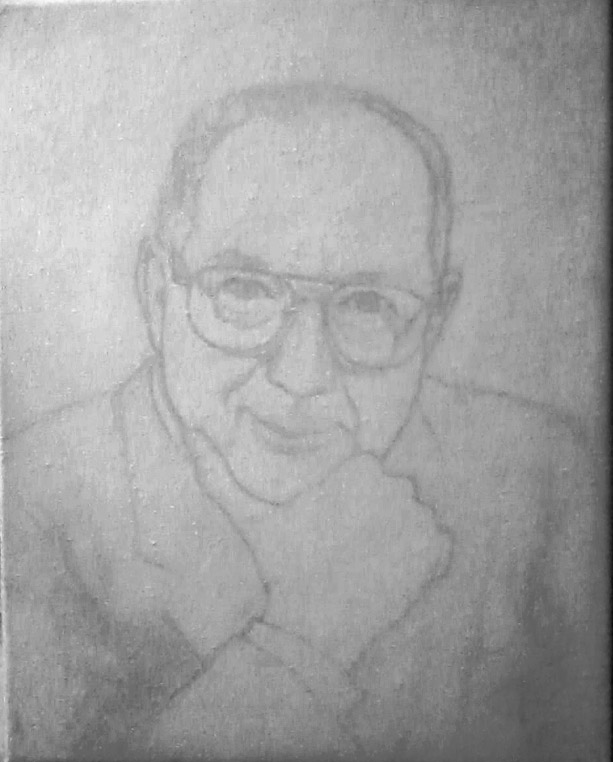
How to Paint Acrylic Portraits Step 1
And for every good pencil stroke I put down, I probably put down about 4 bad ones. I love erasers. I think there is an analogy about life in here somewhere, but I’m sure you can make the correlation yourself! Here is a trick I learned: I use a pastel or charcoal pencil instead. Pastel pencil erases with ease, but you will need a very good sharpener to keep it sharp and not break the lead in the process. Sometimes I use a knife if the sharpener doesn’t do the trick. Another great thing about pastel pencil is that you can use a sepia tone and it will blend in better with the flesh color of your paint. Graphite pencil sticks out like a sore thumb and you have to really work to conceal it in your painting. Because pastel pencil can almost be brushed off the surface of the canvas, it will be necessary to “seal in the sketch” so that you do not disturb or erase it as you paint. I use clear acrylic medium (Matte medium) thinned down with water of a ratio about 80% water/ 20% medium and put this solution in an empty hairspray bottle. Then I lightly mist the solution onto the surface of the canvas. If you find it starting to bead up heavily and dripping, take a cotton towel and gently blot the excess moisture off. Don’t worry–you will not ruin your sketch if you blot it.Let the canvas dry. In the meantime, dump out the excess solution into a separate container, and rinse out your spray bottle by filling it with straight water and spraying it several times to clear the solution out. If you don’t do this, you will need to find another spray bottle for your next painting because the nozzle will be clogged. After your canvas is completely dry, brush over the entire surface with matte medium to completely seal in the sketch. You will find that the pastel pencil sketch is not disturbed because you’ve already partially sealed it in already with the spray.
Take my FREE Acrylic Portrait Painting Challenge!

Learn how to paint a realistic acrylic portrait in my 2022 Spring Portrait Painting Challenge! Even if you’re a beginner. It’s free to join and I’ll teach you how to do it with online, step-by-step video lessons.
In May 2022, several artists like you will all be painting a portrait from the same photo reference. This will be a great chance to learn and create something amazing.
Take the Acrylic Portrait Painting Challenge (it’s free to enter)…and I’ll send you a welcome kit, which includes:
- My Complete Supplies List you will need to paint along (paint, mediums, brushes, canvas, etc.)
- A Palette Guide on how to set up your colors for easy paint mixing.
- The Reference Photo With Grid (coming soon.) It will help you create an accurate, frustration-free sketch!
- Step-by-Step Demonstration Videos on how to paint the portrait successfully, sent right to your inbox.
- Access to my private Facebook Group where you can post your progress, get feedback and be encouraged.
Click the link below to register for my Acrylic Portrait Painting Challenge and get started…
And now back to our tutorial…
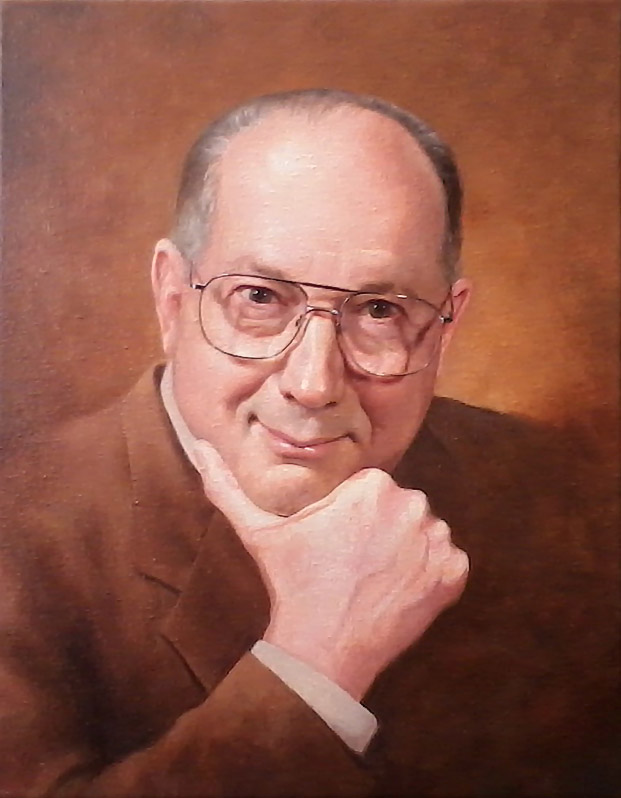
Step 2: Define Your Values. Of course, you know I’m not talking about family values, company ethics or anything like that. (Although those don’t hurt either!) Values are areas of light and dark in artwork, and how they relate to each other. To begin the painting process, I like to take a glaze, a mixture of burnt umber, raw sienna and white, thinned to about 70% translucency with matte medium and then paint that over the entire sketch. What this does is mute the sketch a little bit, so the contrast is not so harsh. And that makes the paint blend in a lot better. Let this dry. Next, use a slightly darker glaze and fill in the darker areas, such as clothing, the background, especially if it will be darker than the value of the face. Brush it out as smoothly as possible. What we want to do is quickly establish the tonal values of the painting and define the contours of the face, hand and clothing. In realistic paintings, we do not use a line to define an person or object from the background, but rather, we separate them by value and color.
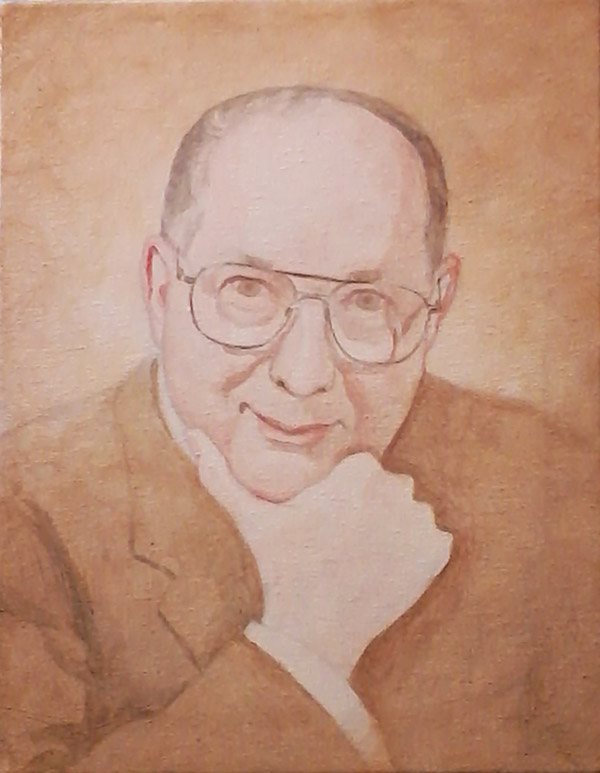
How to Paint Acrylic Portraits Step 2
Having correct value and color is vital. You can add nit-picking point-by-point detail to a painting all you want, but if you don’t establish correct value and color, it will only look amateurish.
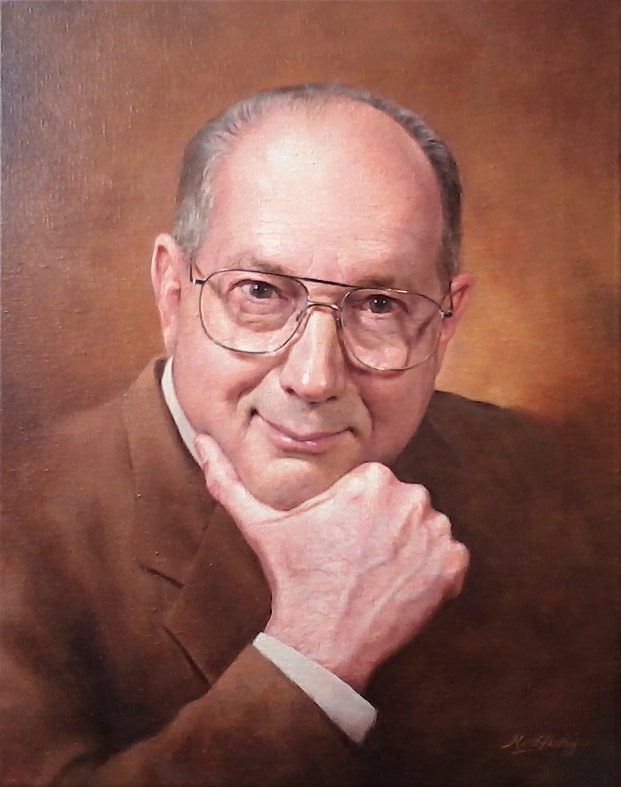
Step 3: Keep on Adding Value As you add more and more glazes, the painting will begin to take shape. By glazing, you are adding a richness and depth that opaque color can’t achieve. In this stage, I am paying close attention to the color choice for the background. I am intentionally adding burnt sienna on the perimeter to give the background warmth, and lightening it to raw sienna and yellow ochre as I work toward the center. This draws your eye in towards the subject.
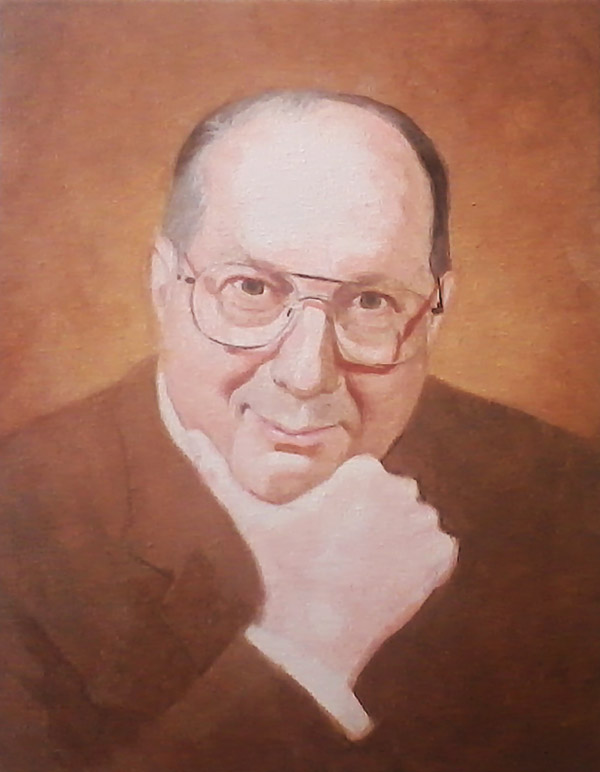
How to Paint Acrylic Portraits Step 3
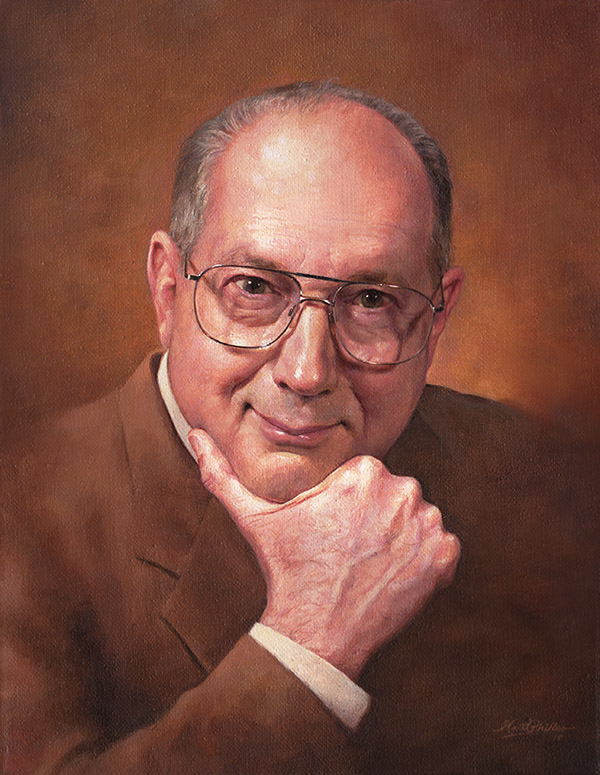
In addition, I am carefully defining the features of the man’s face, by adding shadow to the nose, and especially under the glasses. The suit, by this time, has more than ten layers of glazes. Make sure you work your brush strokes in different directions as you glaze each time to smooth out the appearance of the paint layer. You can also use slightly different colors to add visual interest and vibrancy to the work. But what color choices should you use? Well, for a painting like this, that primarily has sepia tones, stay in that palette. But you will need to employ some cooler contrasting colors like blue and purple. Try to stay away from using black. It’s really a lifeless color. I establish black by using ultramarine blue, phthalo blue, and burnt umber in successive glazes. Here’s a good rule of thumb when mixing color, especially for portraits. I see so many artists that mix white into their colors in an attempt to achieve the lighter values of a portrait, but the end result is muddy. Flesh tones look sickly gray. Instead, do this: Use cool colors (blue, green and some browns) for darker areas and then use warmer colors (red, orange and yellow) for lighter areas. You will need to add red and orange into your flesh tones as you get into the lighter values, especially when you are painting a gradient–that is, a gradual shift from dark to light. Step 4: Clarify and Refine Your Painting. By this stage, you should have a really good idea of what your finished painting will look like. You’ve already established the majority of your values. The colors are mostly set. The painting should now look like a competent study created by a university art student. Now, it’s a matter of adding the nuances–those little details that really make the painting sizzle and beg to be looked at. Since in this example, I am painting a portrait on commission, and it is a memoriam painting of a lost loved one, it is more than making a painting that is visually compelling. The portrait must convey the likeness and personality of the man, because this will be a visual reminder to the grieving family of the person they loved so much. I received a card from one of the people in the bereaved family, and she said the painting made it like he was still there with her. To truly capture that “special something” in the subject, I believe, takes more than a trained eye and hand: it requires divine help. My habit is to pray before I start any work of art and before a studio session, especially when it’s a memoriam portrait. I pray that God will help me to capture the essence of the personality, and that it will truly bless and comfort the one who sees it. And He helps me. I believe you, too, will discover your painting process will go much smoother if you ask God for help. Now, at this level of completion, it’s time to add a simple yet extremely important detail: the reflection of light on the eyes. In most lighting situations, there will be a noticeable pinpoint reflection. Paintings made from outdoor portrait photography will often not have a bright reflection, but there still is a reflection of some sort.
How to Paint Acrylic Portraits Step 4
Capturing this reflection correctly is of utmost importance. You can get away with a lot minor mistakes in a portrait–you can paint the ears a little too big, or the chin a little too long, or the forehead a little too small, but if you get the eyes wrong, your entire portrait is wrong. Why? Because we are trained to look at each other’s eyes when we talk to each other. The eyes are the most striking feature on our face, and some say, the window to our souls. To make a face recognizable, you must capture the eyes as near perfect as possible. So pay careful attention to where you put the reflection, and whether or not there is just one reflection on the pupil, or two. One reflection will always be brighter than the other, but look for that secondary reflection and capture it. The iris (the colored part of the pupil) will always be darker on the side of the reflection, and lighter on the opposite side. It’s similar to a jewel.Remember, too that the shape and color of the eyebrows, as well as how close they are to the eyes are nearly as important as the eyes themselves in capturing the likeness. Pay close attention to what you see in your photograph and replicate it faithfully onto the canvas. You should have already taken care of this–mostly–in your sketch, but don’t worry, you can refine these details in the painting process if you were a bit off. At this level, I really began to concentrate on refining the glasses on the man’s face and painting some highlights on his lips, to give the illusion of moisture. Step 5: Finalize it and Bring it Home! This is the fun part of painting. It’s the paycheck for putting in several hours of preliminary work to get the painting to a point where it really starts looking good. You could call it done, and convince many people that it is done, but you want this art to really be your best work and to shine, so don’t quit yet.
How to Paint Acrylic Portraits Step 5 by Matt Philleo
There are just a few more nuances to capture, a few tweaks needed to make the artwork come alive. For example, in this portrait what I needed to do was give a little more attention to the man’s hand. So I glazed some blue-purple using ultramarine blue and a little alizarin crimson, toned down by burnt umber and white, to suggest veins underneath the skin. Then I strengthened the shadows along the right side of the hand, and lightened the knuckles with some white mixed with a bit of yellow. (Remember, you want to almost always brighten up the lighter areas with warm colors.)Finally, I added some strands of hair on his hands for that final touch of texture. If this had been a portrait of a lady, we would definitely keep that out! Here’s a tip for drawing or painting hair: Don’t paint every strand. Rather, block in the hair with color and value, and suggest the strands by adding just a few loose hairs here and there. If you over-detail the hair you actually lose realism.In painting a great portrait, you want to keep in mind that the face has a variety of hues. If you can capture these subtle differences, you will go a long way in convincing the viewer that they are looking at a photograph, or even better, an image of a real person. We know the lips are pink, and of course with lipstick, red. But the cheeks and ears are often more pink than the rest of the face, and sometimes the nose. The area right around the eyes is a little more of a bluish color (but just slightly!) And for a man, especially if he has darker hair, you can suggest the five-o-clock shadow by using a slightly bluish or green-bluish brown. This is especially true with the shadows under the chin. Again, don’t overdo it, or your subject will look like they only shave every other day! So when is the painting done? Well, some people say once you sign it, it’s done. I have often signed my work only to discover, a moment later, an unresolved area that needs desperately to be worked out and finished off. I can tell you this: for a commissioned painting, once you take a photo of it and your client approves it, you better leave it alone. They love it, and so, it’s done. Hands off! If the painting is for exhibition, or even if you are wondering whether or not it is done before you do a proof image, here’s a good way to tell: If your painting looks fantastic, and then as you continue to work on it, you are not adding any visual appeal to it, stop. You may end up even messing up what you already did. It’s done. And of course, a rapidly approaching deadline may tell you that your painting is done. That’s why I love to work in acrylic. With its fast drying time, I can literally finish a painting, proof it, get paid for it and ship it out all in the same day! Finished!
How to Paint Acrylic Portraits Final by Matt Philleo
Lastly, here is the final portrait in a much clearer image. This 11″ x 14″ painting took about 30 hours to create.
How to Paint Acrylic Portraits Final-clear by Matt Philleo
Oh, and just for fun, here are all the in progress shots of this painting, as a series. Now you can see the gradual shift in each stage of completion much easier.
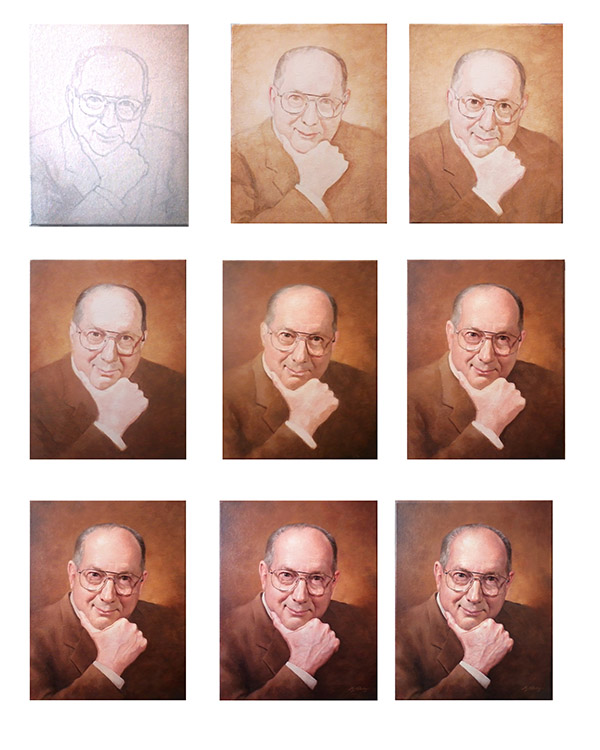
How to Paint an Acrylic Portrait In Progress
I hope these painting tips help you. Please let me know if you have any questions, or if I can help you with any painting project you may have! Share Your Thoughts! Please comment on this article and share with your friends using the social media links on the left sidebar or below. Thanks for spreading the word!


Recent Comments